Corporate IP Ranges
The Corporate IP Range function is used to define IP ranges for both internal and external networks, and to define authentication requirements such as the locations or IP ranges from which users can log in to the Verify Privileged Identity Platform. For more information on using IP ranges in identity policies to control authentication when inside or outside a corporate IP range see Authentication Rules and Tenant IP Restrictions
To manage corporate IP ranges, use the following procedures.
-
Click Settings from the left navigation, then select Corporate IP Range.
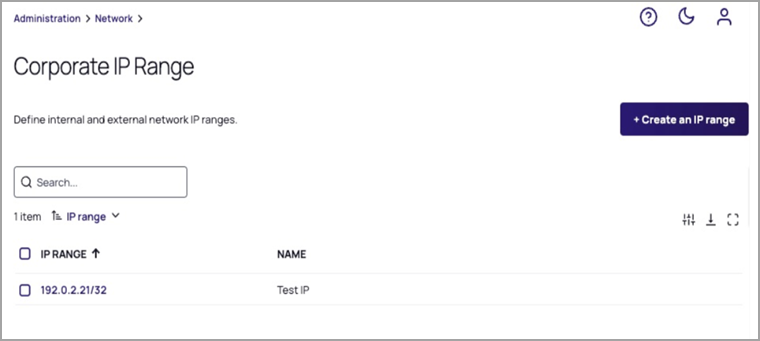
Adding an IP Range
-
Click Create IP Range.
-
In the Create IP Range dialog, fill out the fields for IP Range or Address and IP Range Name.
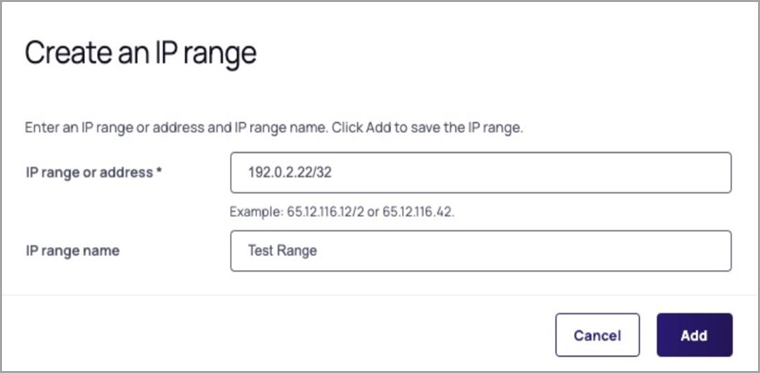
-
Click Add.
Editing an IP Range
- Click the IP range you wish to edit.
- Update the settings as necessary.
- Click Save.
Restricting Login by Corporate IP Range
After you define your corporate IP ranges, use an identity policy authentication rule to control login from inside or outside those ranges.
-
Add the IP ranges your users sign in from. See Adding an IP Range.
-
Open the identity policy for the users you want to restrict, and click the Authentication tab.
-
In the Authentication Rules section, click Edit, then click Add rule.
-
Enter a Name for the rule, and select the Authentication profile to apply when the condition matches.
-
Under Authentication conditions, click Add new condition.
-
Set Condition to IP address, and set Filter to outside corporate IP range or inside corporate IP range.
-
Click Save, then click Add.
Test the policy with a small group before you assign it widely. For other ways to restrict access by IP address, see Login and Access Restrictions.
Deleting an IP Range
-
Select or hover on the IP range you wish to delete, and press the Delete key.
-
When prompted to confirm, click Delete.