Connecting to Verify Privilege Vault On-Premises
The integration of Verify Privilege Vault On-Premises with the Verify Privileged Identity Platform is limited to the Remote Access use case only. To use this integration, you must launch a Remote Access session from a vaulted secret stored in Verify Privilege Vault On-Premises. No Verify Privilege Vault capabilities, such as lifecycle management, can be managed from the Platform interface at this time.
Accessing the Verify Privileged Identity Platform
Current Verify Privilege Vault On-Premises customers can access the Verify Privileged Identity Platform and Privileged Remote Access by contacting IBM Support to request the Verify Privileged Identity Platform without the attached Verify Privilege Vault Cloud.
After signing up for a trial, users will get a welcome email with the subject line, Welcome to your Verify Privilege Vault Cloud Trial on the Verify Privileged Identity Platform. Follow the steps outlined in the welcome email to provision your Platform tenant
Prerequisites
-
Verify Privilege Vault On-Premises version 11.7.000049 or newer.
-
An administrator account on both Verify Privilege Vault On-Premises and on the Verify Privileged Identity Platform.
The Verify Privileged Identity Platform and Verify Privilege Vault On-Premises accounts must share the same login username, and the user must be logged in with this username in both the Platform and Verify Privilege Vault On-Premises when following the steps below. This is true for any administrator accounts used for setting up the Verify Privileged Identity Platform and Verify Privilege Vault On-Premises.
-
Ensure that the network prerequisites are fulfilled to enable the integration between Verify Privilege Vault On-Premises and the Privileged Remote Access feature on the platform.
Integration Steps
- Install a Privileged Remote Access engine.
- Add a new Verify Privilege Vault On-Premises connection to the platform.
- Update the Platform integration settings on Verify Privilege Vault On-Premises.
- Update your Verify Privilege Vault On-Premises connection with the PRA site.
- Verify the overall integration.
Install a Platform Engine With PRA Capabilities
Deploy a Platform engine and ensure that the engine has access to your Verify Privilege Vault On-Premises instance.
- Log in to the Platform.
- Follow the steps in Adding a Platform Engine .
Add a New Verify Privilege Vault Connection
-
Log in to the platform.
-
Click Settings from the left navigation, then select Authentication profiles.
-
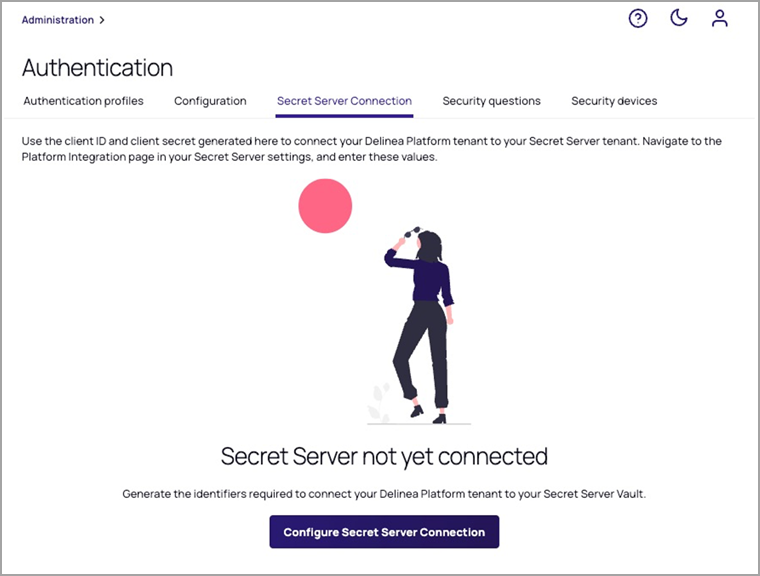
Select the Secret Server Connection tab.
-
Click Configure Secret Server Connection to generate the required connection credentials.
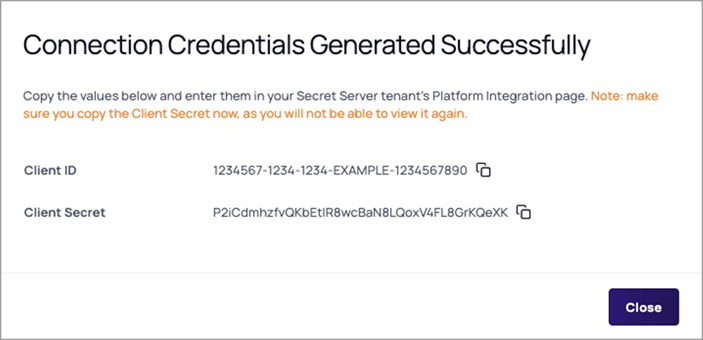
The Platform generates a Client ID and Client Secret.
-
Make note of the Client ID and Client Secret values. You will need them later.
-
Update the Secret Server URL field, using the format
https://<hostname or IP address>/SecretServer. For example,https://secret-server.example.local/SecretServer.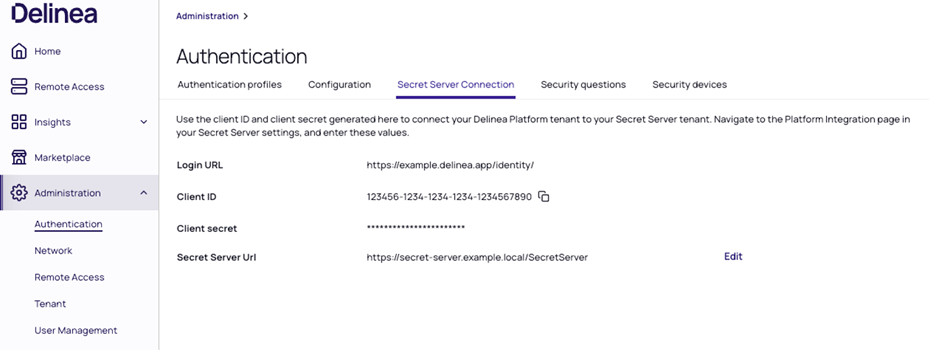
Update the Platform Integration Settings On Verify Privilege Vault
-
Log in to your Verify Privilege Vault On-Premises instance.
-
Select Administration > Platform Integration.
-
Click Edit.
-
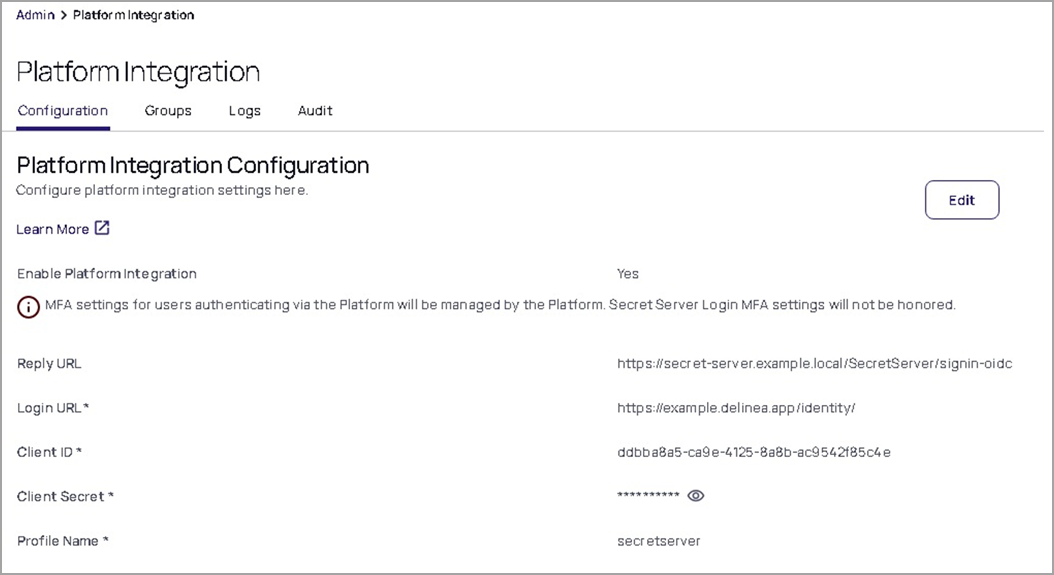
Update the following settings:
- Login URL: the Platform login URL that you copied from the earlier step
- Client ID: the identifier assigned part of the OIDC connection
- Client Secret: a secret used by Verify Privilege Vault to authenticate with the platform
Update Your Verify Privilege Vault Connection with the PRA Site
After the Platform engine is successfully installed, perform these steps:
-
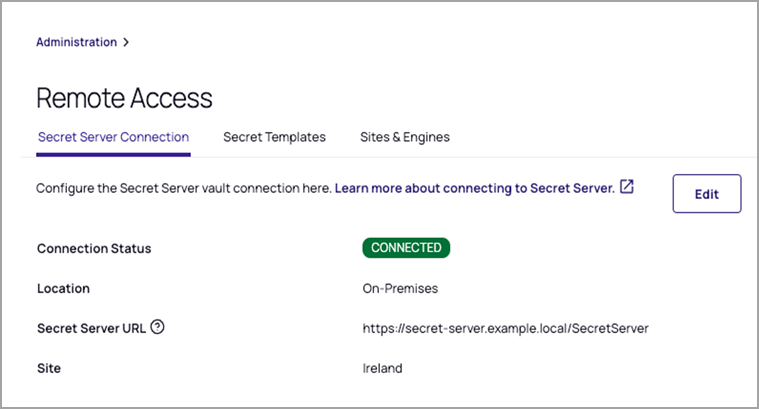
Navigate to Administration > Remote Access > Secret Server Connection.
-
Click Edit.
-
Update the Site field with the PRA site that contains the engine you just created.
Verify the Overall Integration
-
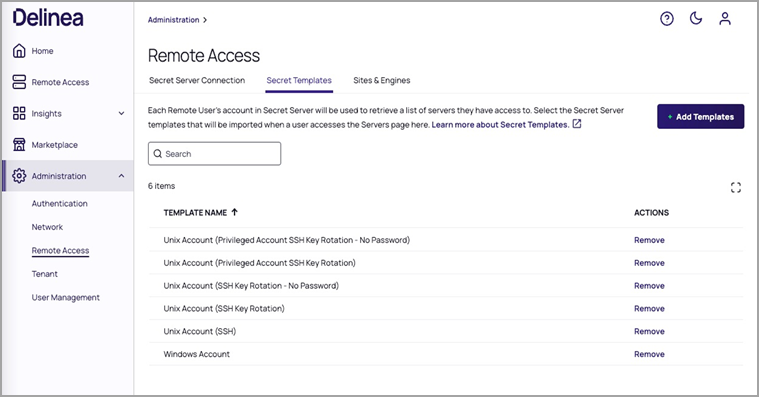
Navigate to Administration > Remote Access > Secret Templates. A default set of Verify Privilege Vault templates displays. You can add other templates as desired by clicking Add Templates.
-
Select Remote Access from the left navigation menu. Typically, secrets created by or shared with the logged-in user are listed.
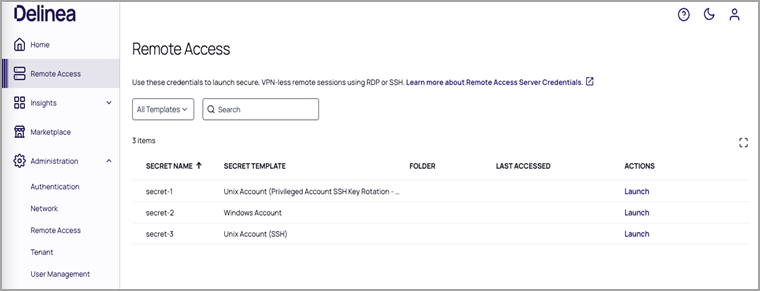
You can now launch Remote Access sessions from the secrets that support PRA by clicking the Launch link under the Actions column.
User Provisioning
Platform users are not automatically provisioned in Verify Privilege Vault On-Premises when their Platform account is created. Instead, Verify Privilege Vault On-Premises accounts are created on demand — the first time a Platform user interacts with an SSOP-integrated feature.
Just-in-Time Account Creation
A corresponding Verify Privilege Vault On-Premises user account is created automatically when the Platform user first performs either of the following actions:
-
Clicks the Privileged Remote Access button to launch a Remote Access session from a secret stored in Verify Privilege Vault On-Premises.
-
Navigates to the Secret Server Settings page in the Platform.
Until one of these interactions occurs, the user will not appear in Verify Privilege Vault On-Premises and will not be able to access SSOP-integrated features. Administrators should not expect newly created Platform users to be immediately visible in Verify Privilege Vault On-Premises.
User Classifications: Native vs. Hybrid
After a Platform user account is linked to Verify Privilege Vault On-Premises, the user is classified based on the order in which the accounts were created:
-
Native: The user account was created in the Platform first, and the Verify Privilege Vault On-Premises account was created afterward (via the just-in-time process described above). Native users can only authenticate through the Platform — they cannot log in to Verify Privilege Vault On-Premises directly.
-
Hybrid: The user account existed in Verify Privilege Vault On-Premises first, and a Platform account was associated with it afterward. Hybrid users can authenticate through both the Platform and Verify Privilege Vault On-Premises directly. Passwords are not synchronized between the two systems and must be managed separately in each.
You can view a user's classification on the user details page under the Secret Server Details section.
Group Synchronization
Platform groups are synchronized to Verify Privilege Vault On-Premises on a recurring timer, not on demand. This means group memberships may not reflect in Verify Privilege Vault On-Premises immediately after a change is made in the Platform. However, group sync does not pre-provision individual user accounts — a user must still trigger just-in-time account creation through one of the interactions described above before they can use SSOP-integrated features.