Integrating with Verify Privilege Vault Analytics
IBM Security's Verify Privilege Vault Analytics (VP-VA) SaaS product can be integrated with Verify Privilege Manager cloud instances
For the integration to work correctly independent of your Verify Privilege Manager instance, you need to have a IBM Security enabled VP-VA instance.
Refer to the PBA Documentation for details on features and functionality of VP-VA.
VP-VA System Settings Details
You will need to retrieve the VP-VA System Settings details required for setting up the integration in Verify Privilege Manager.
-
Navigate to the PBA Systems Settings page (/system_settings/).
-
Use the Syslog URL and port information when setting up the SysLog Foreign System below. Use the Event Post URL and the X-API-Key when setting up the Send Application Events to PBA below.
Setting Up VP-VA Integration on Verify Privilege Manager
Required VP-VA resources are provided via Verify Privilege Manager Configuration Feeds.
Downloading and Installing the VP-VA Config Feed
- In you Verify Privilege Manager console, navigate to Admin | Config Feeds.
- Expand Privilege Manager Product Configuration Feeds.
- Expand Thycotic Management Server Core.
- Install Privileged Behavior Analytics Integration.
After the install, proceed to the Foreign Systems setup.
Setting up the VP-VA SysLog Foreign System
-
Navigate to Admin | Config and select Foreign Systems.
-
Select SysLog.
-
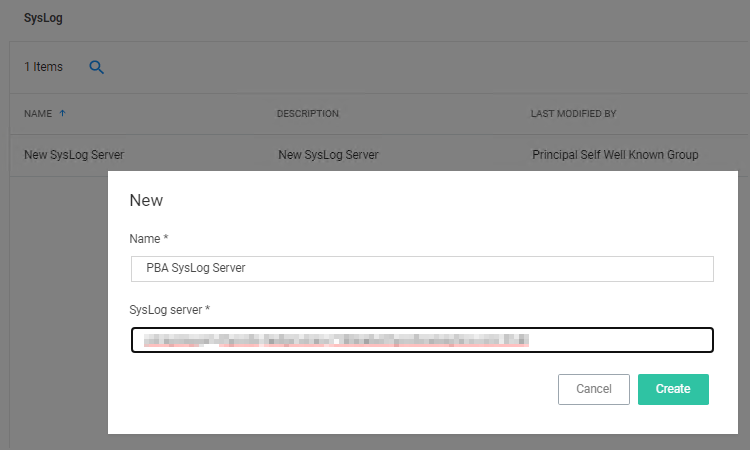
Click Create.
-
Enter a name and your SysLog server details.
-
Click Create.
-
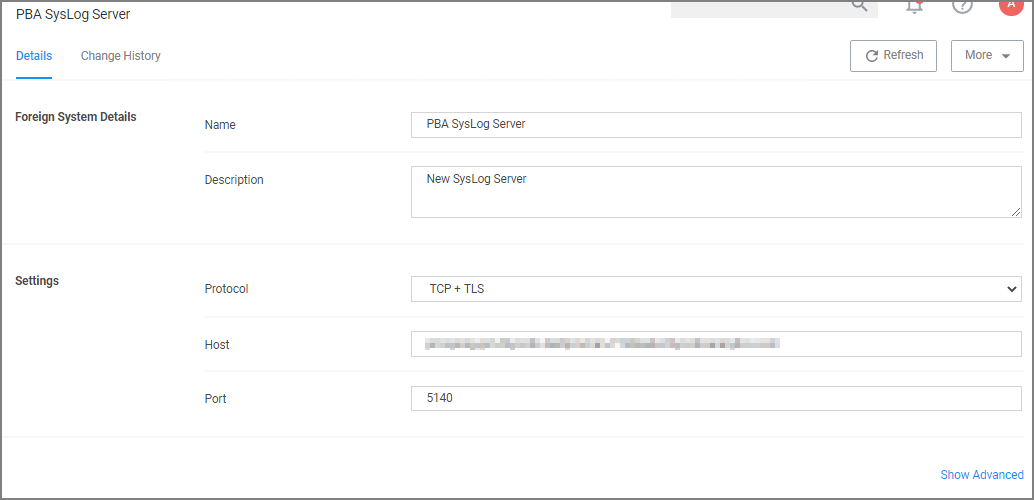
Verify that your Protocol, Host, and Port match your SysLog server details (SysLog URL and SysLog Port from the VP-VA System Settings details).
Using the VP-VA Send Tasks
-
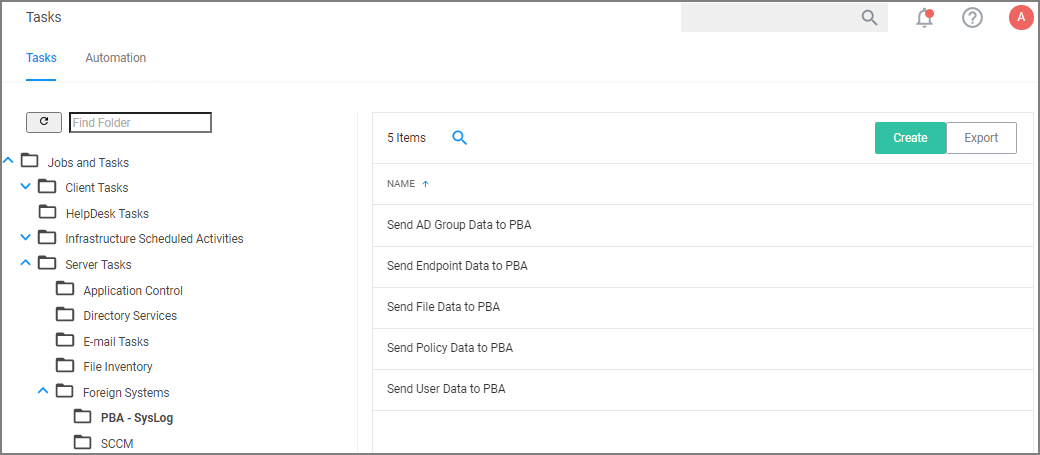
Navigate to Admin | Tasks and from the folder tree select Server Tasks | Foreign Systems.
-
Click PBA - SysLog.
-
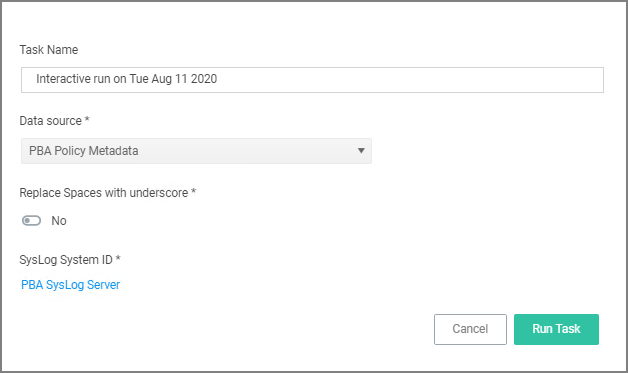
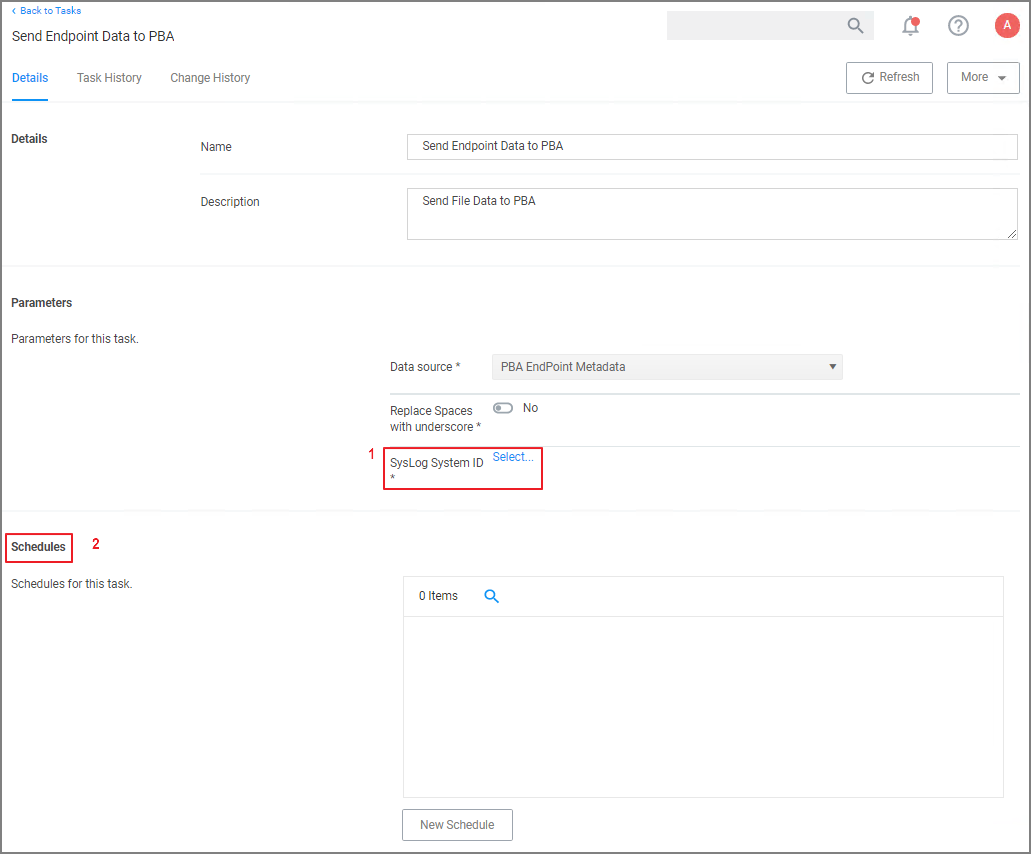
For Verify Privilege Manager to send data based on any of these task, the VP-VA SysLog server you created as a Foreign System above, needs to be added as the SysLog System ID. This can either be done
- On Demand when running the task:
- By setting up a schedule:
Repeat for each of the data sets you want to use in VP-VA.
Enable Send Application Events to VP-VA
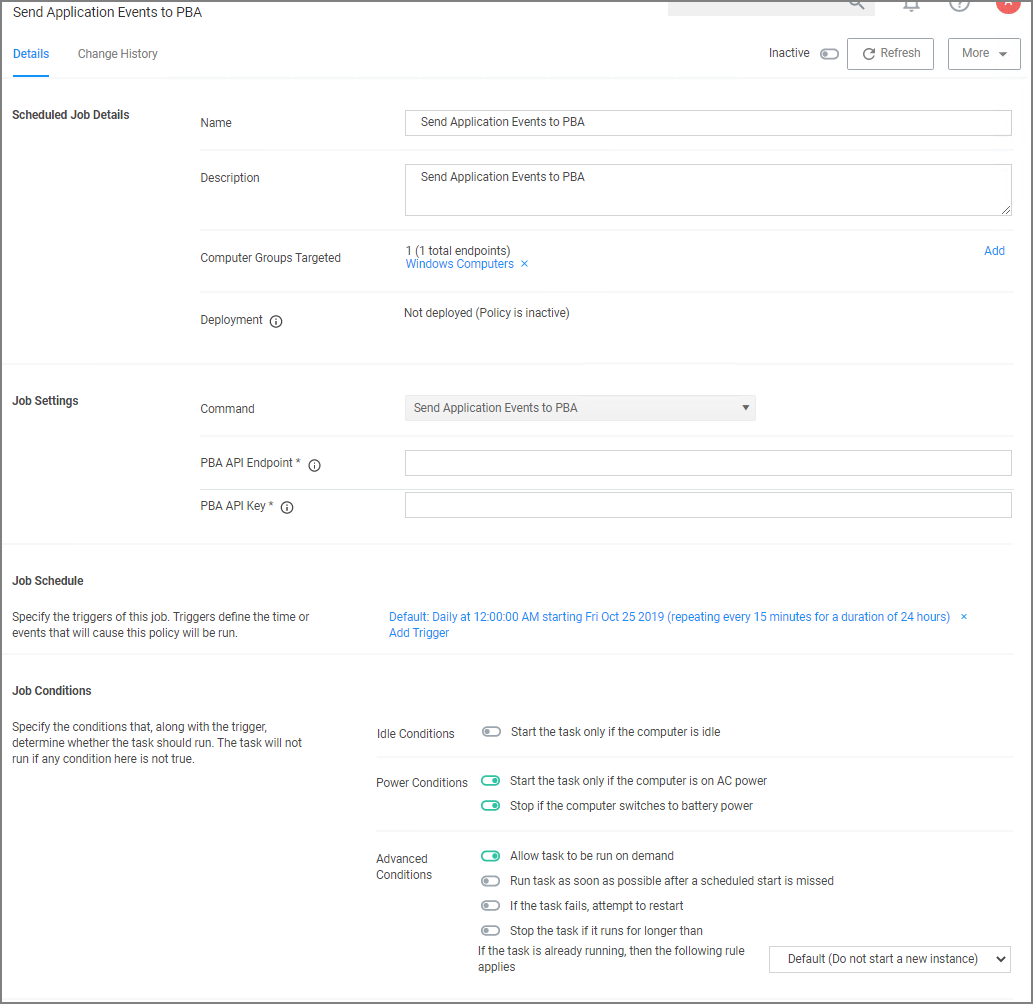
The config feeds installation also add a remote scheduled client command for VP-VA to Verify Privilege Manager. The Send Application Events to PBA policy is by default disabled.
-
Under your computer Group navigate to Scheduled Jobs.
-
On the Scheduled Jobs page search for VP-VA and select Send Application Events to PBA.
- Under Job Settings enter the VP-VA Event Post URL and X-API-Key details from the VP-VA system settings information.
- Modify the Job Schedule if customization is required.
- Customize any of the Job Conditions to better fit your implementation.
-
Click Save Changes.
-
Set the Inactive switch to Active.
-
Next to Deployment click the i icon and select the Resource and Collection Targeting Update task to run.

