Connecting to the Jamf Server
Before you can import data from Jamf Pro, you need to setup a foreign systems connection in Verify Privilege Manager for the Jamf integration.
-
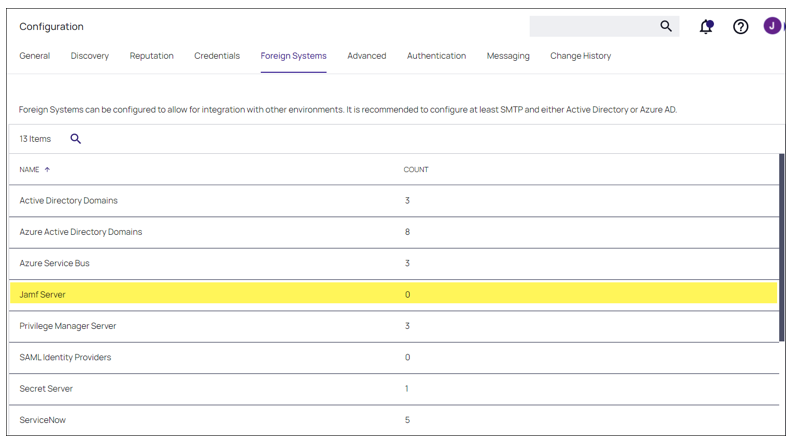
Navigate to Admin | Configuration | Foreign Systems.
-
Select Jamf server. If this is not listed, make sure the connector is installed. Refer to Installing Foreign System Connectors.
If you are a cloud customer and don't see Jamf in the list, contact IBM Security support to have the connector added to your cloud instance. Once it is listed, continue with the next step.
-
Click Create to establish a Jamf server.
-
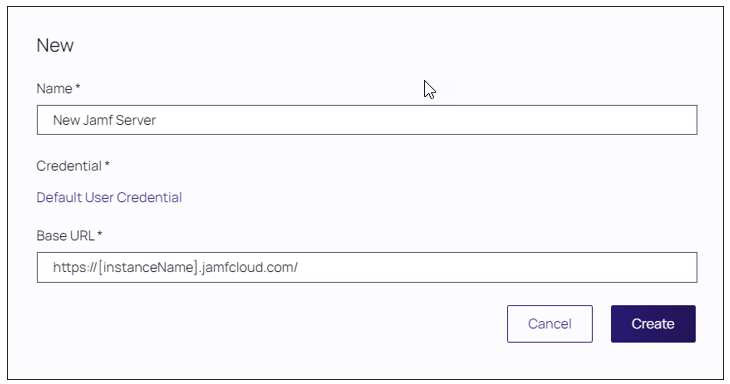
From the New window, enter the Name of your Jamf Server.
-
Click Default User Credential.
The Verify Privilege Manager Default User Credential is populated by default and needs to be changed to the actual Jamf credential.
-
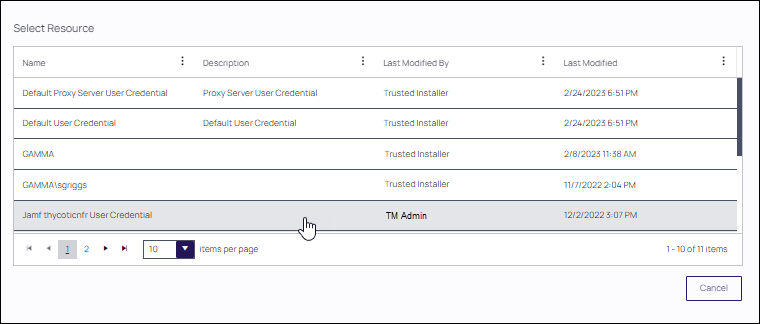
From the Select Resources dialog, select the credential you established. Click Select.
-
The New dialog is returned with your selection in the Credential field. Enter the Base URL of your Jamf Server.
-
Click Create.