Importing Items
The Import Items feature allows you to update policies, tasks, or resource filters in an existing Computer Group.
Prior to importing any data into your environment, IBM Security recommends to create a backup of the current Verify Privilege Manager Database.
Items can be imported in the following ways (detailed below).
-
Editing XML directly in the XML viewer
-
Uploading XML from a supported file
Unsupported or missing file extensions trigger an error message on the import modal.
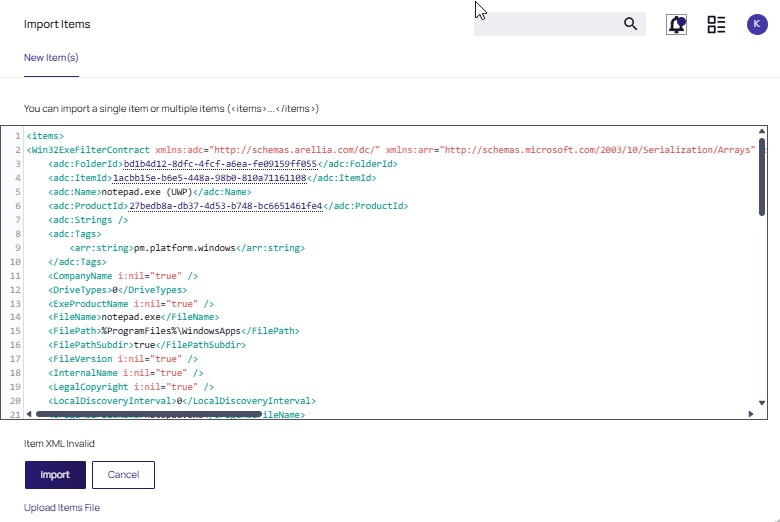
Import XML Using the Editor
To import XML that contains the definitions required for the update,
- Navigate to Admin | Import Items.The XML viewer opens.
You can either directly copy XML into the editor screen or you can drag a file directly into the editor with one the following extension types..xslt
.xbl
.xsl
.xml
- Click Import. The system displays a Success message.
Import Using File Upload
A file containing the updated parameters can be identified for import into a specific Computer Group. Supported file types for the import are .xslt, .xbl, .xsl, .xml, and .zip.
- Navigate to Admin | Import Items.
- Click the Upload Items File link.
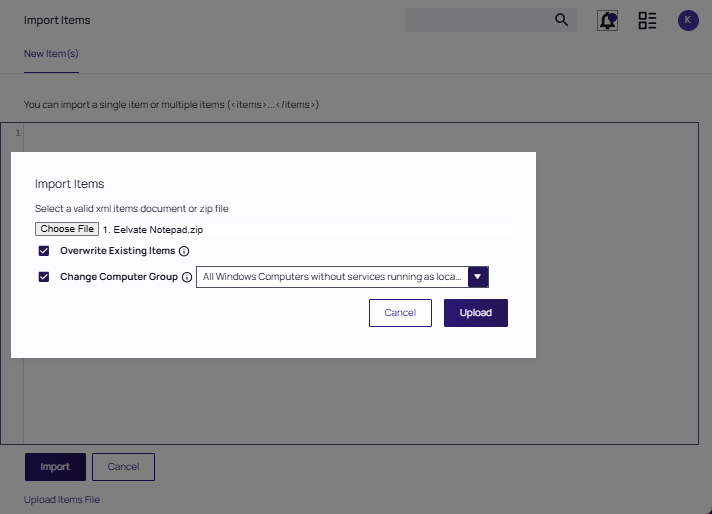
- By default the Overwrite Existing Items checkbox is selected. If you want to skip items that already exist, disable the checkbox. The import is based on the following conditions:
- When the checkbox is selected, import all items (including changes saved in state).
- When the checkbox is NOT selected, import only new items (including changes saved in state).
- Any policies imported will be disabled (assuming they are not skipped.
- Enable the Change Computer Group checkbox to specify the Computer Group that will be updated.
- Select Choose File, navigate to the file that contains the XML, then click Open. Supported file types include:
- .xml
- .zip
The selected file is displayed in the dialog box.
- Click Upload.
You can verify the uploaded data by navigating to Admin | Folders. Depending on your import, the data is listed under Policies, Tasks, or Resource Filters.