Connecting Agents to the Verify Privilege Manager Server via Group Policy
Regardless of how you installed agents or rolled agents out to your network, Verify Privilege Manager has a method to link those agents with Servers. Verify Privilege Manager has templates (files) that enable you to point agents back to the Verify Privilege Manager Server.
To perform this task, do the following steps:
-
Download the attached PrivilegeManagerAgent.admx and PrivilegeManagerAgent.adml zip folders and extract the corresponding files (one file from each zip folder).
-
Install the downloaded and extracted custom Verify Privilege Manager Group Policy files either on a single machine or on a domain controller.
- To install on a single machine:
- Copy PrivilegeManagerAgent.admx to
%systemroot%\PolicyDefinitions - Copy PrivilegeManagerAgent.adml to
%systemroot%\PolicyDefinitions\en-US
- Copy PrivilegeManagerAgent.admx to
- To install on a Domain Controller effectively making the custom GPO available to all Domain Administrators:
- Copy PrivilegeManagerAgent.admx to
%systemroot%\SYSVOL\domain\Policies\PolicyDefinitions - Copy PrivilegeManagerAgent.adml to
%systemroot%\SYSVOL\domain\Policies\PolicyDefinitions\en-US
- Copy PrivilegeManagerAgent.admx to
- To install on a single machine:
-
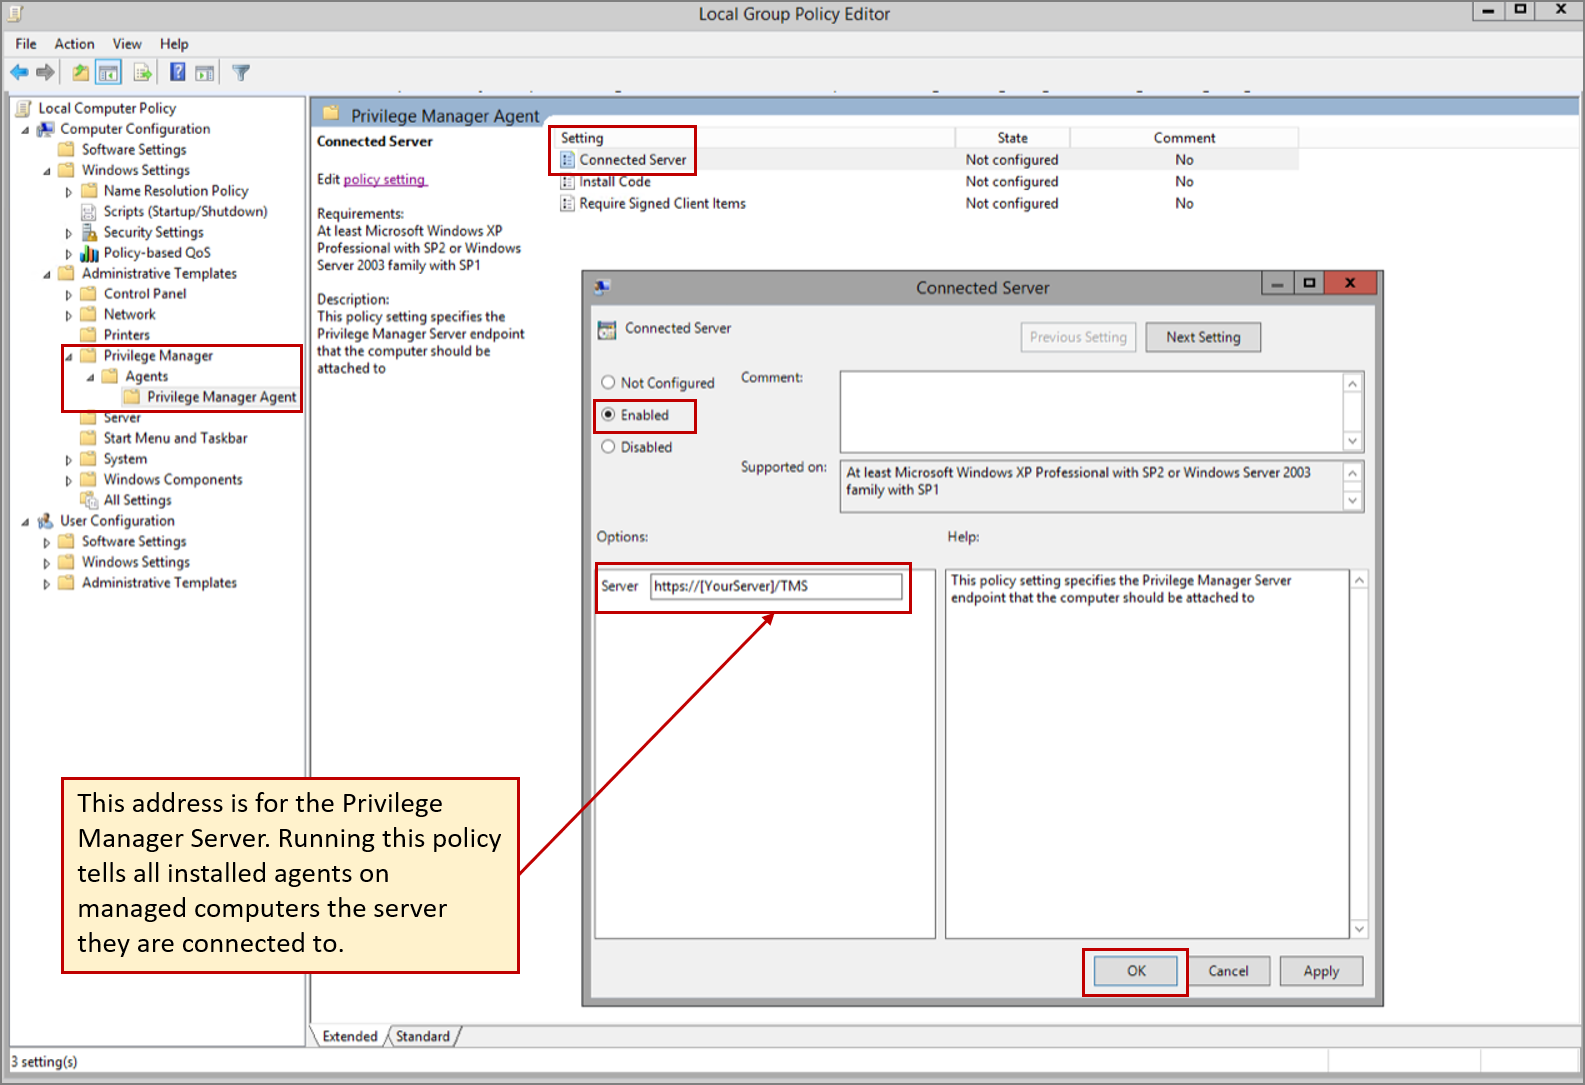
From the Group Policy Management Editor, navigate to Policies.
-
Go to Administrative Templates > Verify Privilege Manager > Agents > Verify Privilege Manager Agent and click Connected Server.
-
In the Connected Server window click Enabled.
-
In the Server field, enter the URL for your Verify Privilege Manager Server, click OK.
-
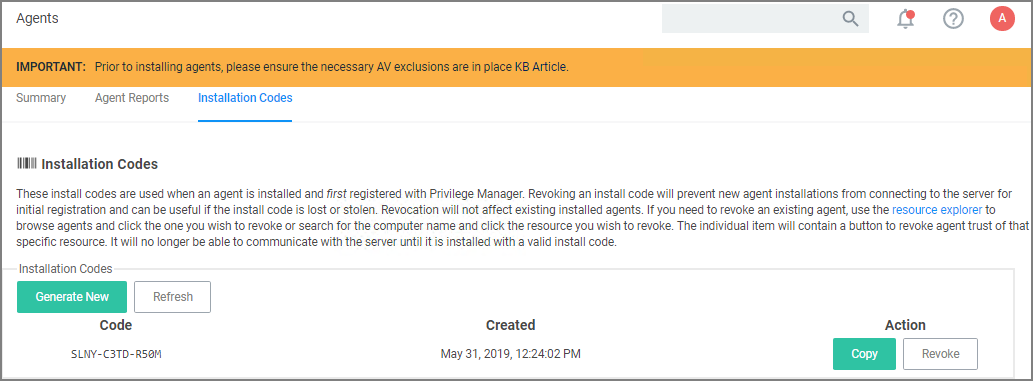
Now you need to copy some data from Verify Privilege Manager. In Verify Privilege Manager, navigate to Admin | Agents | Installation Codes tab.
-
Copy the Code value by clicking Copy.
-
Switch back to the Group Policy Editor, in the Verify Privilege Manager Agent window, click Install Code.

- In the Install Code window, click Enabled.
- In the Install Code field, paste the Code value you copied from Installation Codes tab in Verify Privilege Manager.
- Click OK.
-
Set the Client Item Signature Validation. By default, Verify Privilege Manager validates only client items that have a signature present. If you want to require that all client items have a valid signature, then configure the group policy settings to enforce the Require Signed Client Items setting.
Un-Installing Old Templates
If you had previously downloaded and installed files which had the names "AMSAgent.admx" and "AMSAgent.adml", these should be removed. Do so as follows:
-
To un-install from a single machine:
- Delete AMSAgent.admx from
%systemroot%\PolicyDefinitions - Delete AMSAgent.adml from
%systemroot%\PolicyDefinitions\en-US
- Delete AMSAgent.admx from
-
To un-install from a Domain Controller:
- Delete AMSAgent.admx from
%systemroot%\SYSVOL\domain\Policies\PolicyDefinitions - Delete AMSAgent.adml from
%systemroot%\SYSVOL\domain\Policies\PolicyDefinitions\en-US
- Delete AMSAgent.admx from