Agent Hardening 10.7.1 and up
Agent installations on endpoints can be secured, only allowing a specified user access to start or stop an agent service and denying any agent control access to a local Administrator or basic user account.
To make sure that local Administrators do not tamper with IBM Security agents running on their system, Verify Privilege Manager Administrators can define users that can start and stop the Verify Privilege Manager services running on endpoints, such as the IBM Security Agent or IBM Security Application Control.
A user or group needs to be available in Verify Privilege Manager to be selected while setting up the task. This user or group will have rights to start and stop agent services running on endpoints once the Restrict Account Permissions on Agent Services (Windows) policy is enabled.
If you implemented Agent Hardening prior to 10.7.1, disable and delete these policies: Agent Service Start /Stop Control (Windows) and Agent Service Clear Restrictions (Windows)
If you encounter issues when running the installer, refer to Agent Hardening and Installer Issues in the Troubleshooting topics. on an agent endpoint as the user defined in the hardening, undo the hardening by updating the policy with local administrators added. Use your preferred method t run the policy. Then, run the installer as a local administrator.
Editing the Restrict Account Permissions on Agent Services (Windows) Policy
-
Under your Computer Group, select Scheduled Jobs.
-
Search for Restrict Account.
-
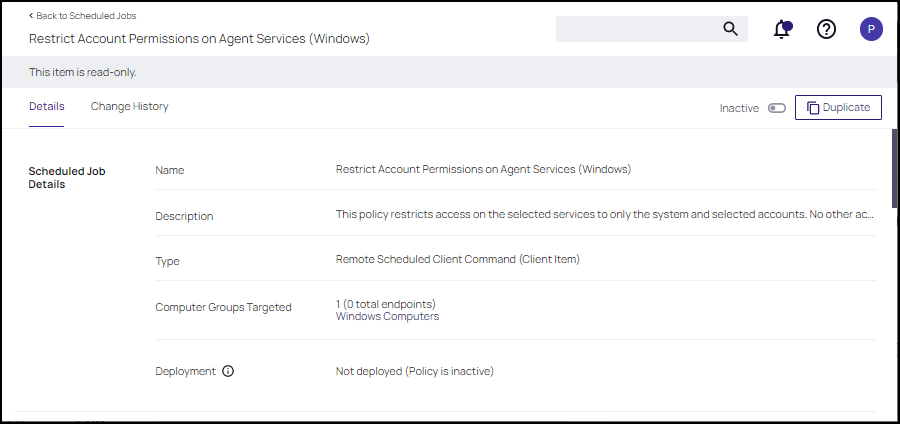
Click on the Restrict Account Permissions on Agent Services (Windows) policy. To customize the policy click Duplicate.
-
Customize the name of the copied policy and click Create.
-
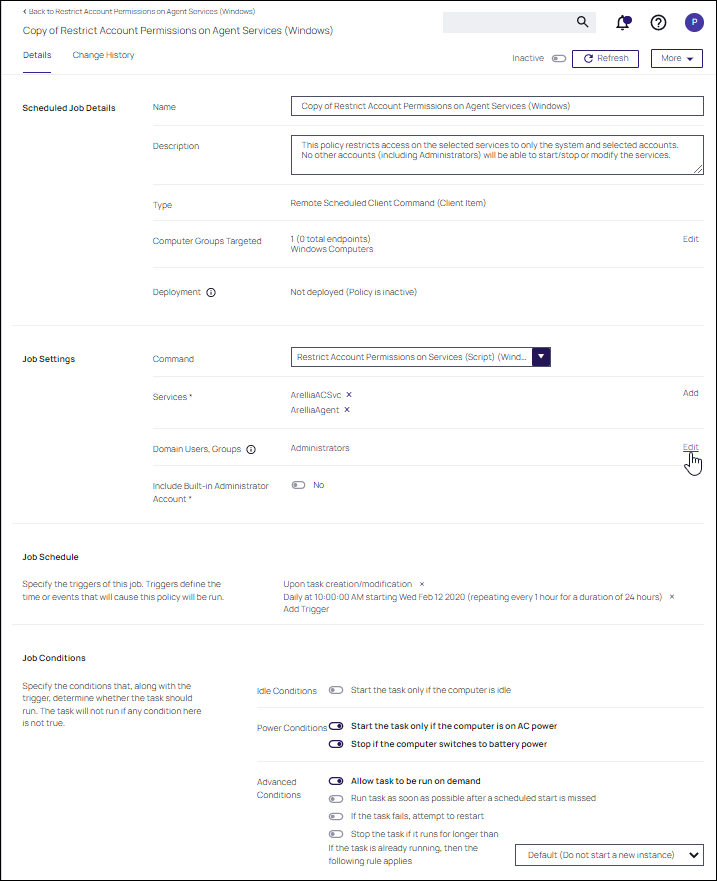
Customize the policy's Scheduled Job Details, Job Settings, Job Schedule, and Job Conditions.
- Under Services the Arellia Application Control Service and Arellia Agent Service are present by default. Add any services you might also want to protect. Use the search field to find and specify other service names.
- For Domain Users, Groups use Edit and use the search field to find specific user accounts that have permissions to make changes to the specified services. Administrators are present by default, if you wish to limit to only a subset of users with administrative rights, create a group and update accordingly.
- Use the Include Built-In Administrator Account toggle to determine whether to include the built-in administrator.
-
Click Save Changes.
-
Set the policy to Active.
If you wish to update a hardened agent, refer to information under the topic Windows Agents | Hardened Agents.


