Sending Policies to Workstations
After setting up your first policies, keep in mind that even after you enable them, new policies are not immediately sent to target endpoints (workstations). Instead, policies are updated on workstations via the schedule defined by the Update Applicable Policies task. By default this tasks runs once daily.
-
In your Computer Group, select Scheduled Jobs.
-
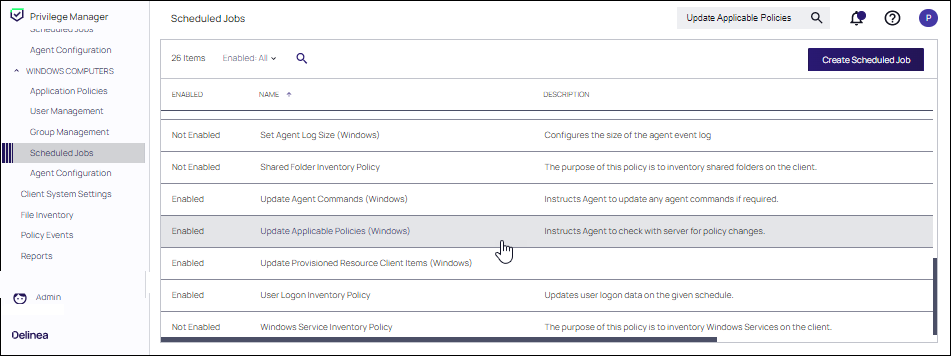
Search for the Update Applicable Policies task:
-
Select the Update Applicable Policies (Windows) for example.
-
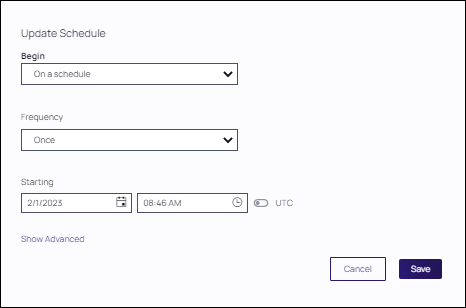
To edit the time scheduled that sets off this task, under Job schedule click Add Trigger.
- Select to run this schedule Once on demand and make sure the time indicated is in the future. Click Show Advanced for more options for the modification.
In production environments having a delayed deployment schedule prevents performance issues when adjusting policies and rolling them out across a large number of agents on your network. However, when setting up new policies you may want to immediately activate them on testing workstations and verify your configurations are working correctly.
-
Click Save. The data under Job Schedule indicates to run once.
-
Click Save Changes for the modification to take effect.
View Deployment Status
Within a Policy's Detail View, verify the deployment status. This will tell you how many computers the policy is already deployed on:
If the deployment status number is 0 or incorrect, it is possible that the Resource and Collection Targeting Update task needs to run.
Update Policies on an Endpoint using Powershell (prior version 10.7)
On Verify Privilege Manager version prior to 10.7, the fastest way to deploy or update your policies on a specific testing workstation is by running a simple Powershell script directly on your test machine where a IBM Security Agent is installed.
-
On your workstation, right-click on the Windows Powershell application and select Run as Administrator.
-
Navigate to the Agent directory by entering the following command and then enter:
Copycd "C:\Program Files\Thycotic\Powershell\Arellia.Agent" -
Next type:
CopyUpdateClientItems.ps1 -
Press Enter.
If your policies are not immediately updated, wait a few minutes and try running the script again.
After you've updated your test workstations, you can try running applications that are targeted by your policies to make sure the policies are configured correctly. You will also see the policy's Deployment status information updated, if refreshed.
Agent Event Log Viewer
Another helpful place to look when setting up new policies is your Agent's Event Log Viewer. On your workstation:
- Navigate to your IBM Security Agent files. This is usually located in
C:\Program Files\Thycotic\Powershell\Arellia.Agent. - Right-click on AgentLogViewer and select Log Viewer. The Agent Event Log Viewer displays and shows updates in real time, as the agent communicates with the Verify Privilege Manager server. For remote access, Agent logs are also viewable through the Windows Event Viewer.
- Scroll to the top of the page to see the most recent activity from your IBM Security Agent.
- Deselect Information in the upper right-hand corner to narrow search results for any Errors and Warning messages that may be occurring. You can also double-click any line item for more detailed information about each event.
Now that you know how to update your workstations and check to make sure your policies are working, it's time to start building new policies!


