Help Desk Approvals
Verify Privilege Manager enables end users to request elevation and then have their request approved or denied by the helpdesk. You can approve or deny requests via the Verify Privilege Manager console, or forward requests to a third-party ticketing system such as ServiceNow.
Creating a Helpdesk Policy
-
Using the Policy Wizard, create a controlling policy that elevates requiring approval.
-
Select what file types you want targeted with the approval elevation.
-
Choose your targets. You can specify several different targets.
-
Name your policy and click Create.
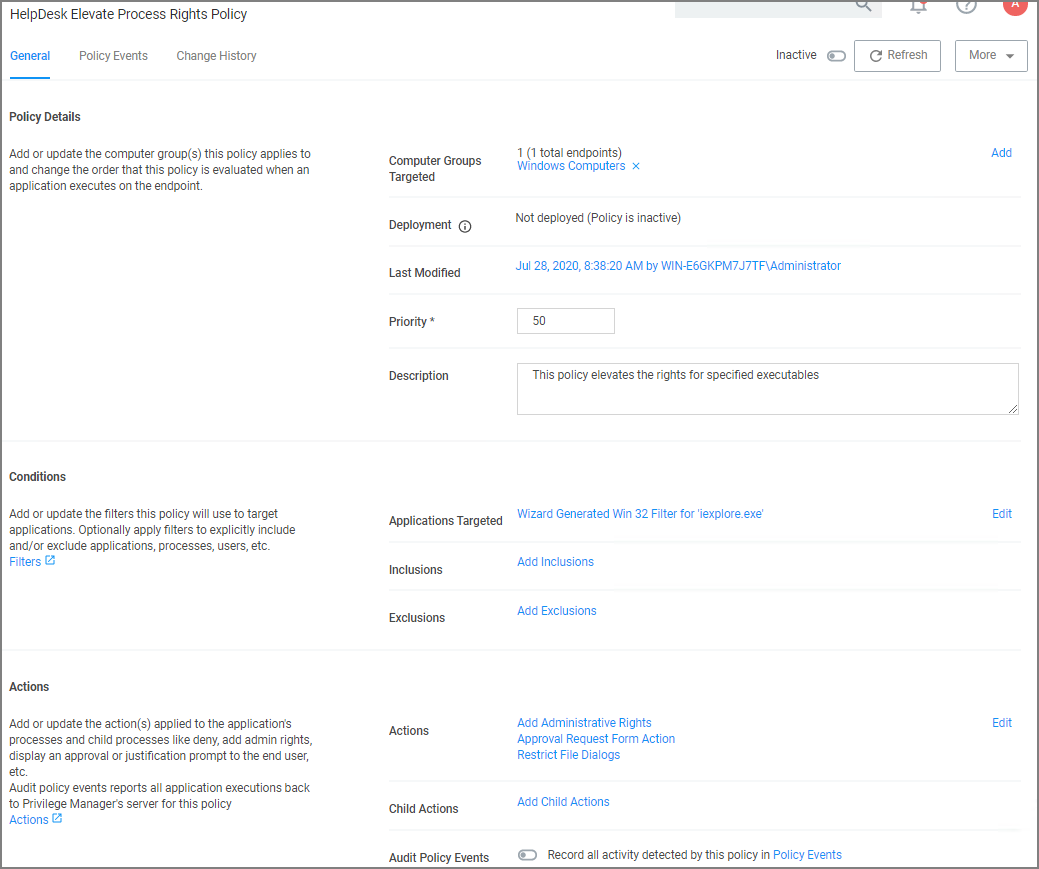
The important wizard added actions on this policy are:
- Approval Request From Action
- Restrict File Dialogs
- Add Administrative Rights.
-
Set the Inactive switch to Active.
Once the agent receives the update, users receive a message action dialog to enter their written request in the Reason (required) field which then sends a request to either the Verify Privilege Manager console or integrated Helpdesk.
Workflow
When end users try to open a restricted application, they must enter a reason for needing the application and send it for approval. While the request is being evaluated, whenever end users start the application a status pending message will appear. Once the request has been approved or denied, end users receive an approval or denial.
Approve requests
To approve or deny requests in the Verify Privilege Manager Console, go to Admin: Tools | Manage Approvals to view all application requests.
