Quarantine Specified Malware
For known cases of malware or ransomware, you can use Verify Privilege Manager to prevent specified applications from running and place them in a quarantine. For this example we'll target the generic executable “malware.exe,” but you can do this with any file name.
-
Navigate to Admin | Filters and click Create Filter.
-
From the platform drop-down select the OS to target, for this example Windows.
-
From the type drop-down select File Specification Filter.
-
Add a Name and Description, click Create.
-
On the filter page, under Settings: File Names type malware.exe.
-
Click Save Changes.
-
Under you Computer Group, select Application Policies.
-
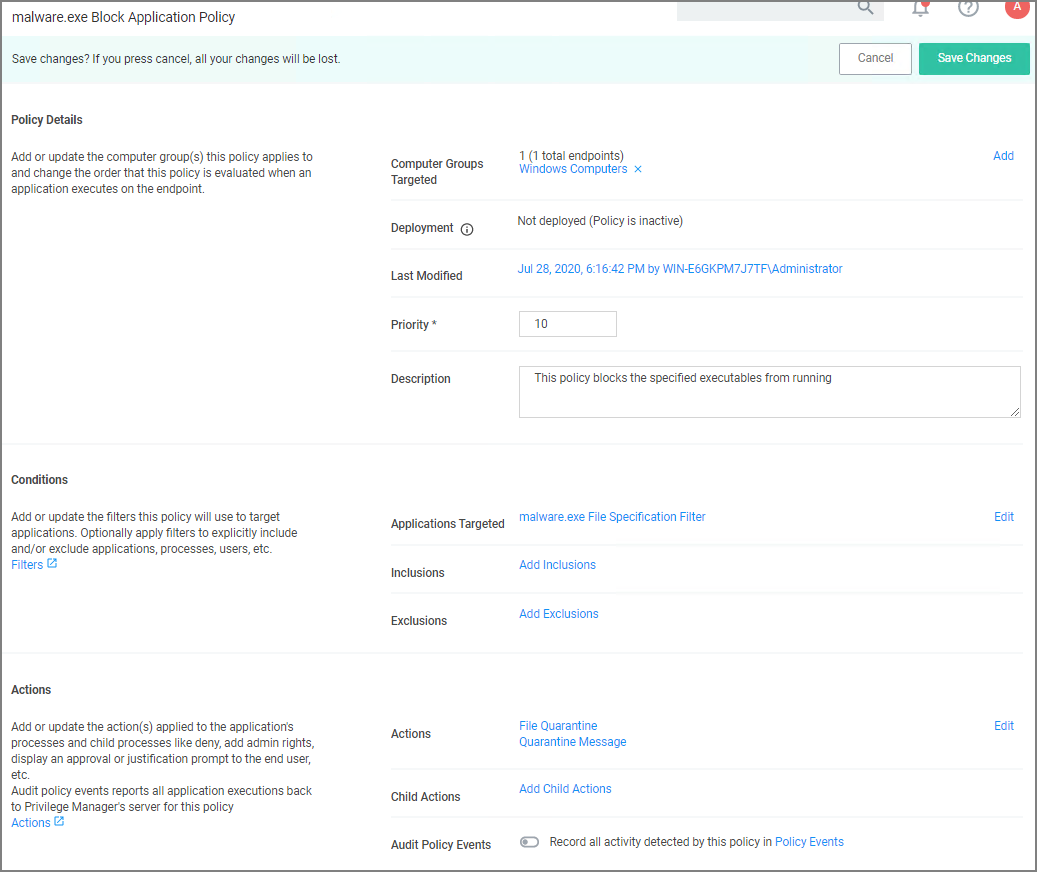
Using the Policy Wizard, create a controlling policy that blocks application execution on endpoints.
-
Select how you want the processes blocked, either Block Silently or Notify and Block, for this example we use Block Silently. Click Next Step.
-
Select what types you want the policy to block, for this example it's Executables.
-
Choose your target, for this example Existing Filter.
-
Search for and Add the malware.exe filter created in the above steps.
-
Click Update.
-
Click Next Step.
-
Name your policy and add a description, click Create Policy.
-
Under Actions, click Edit.
-
Search for quarantine and Add the File Quarantine and Quarantine Message actions.
-
Remove the Deny Execute and Deny Execute Message actions.
-
Click Update.
-
Click Save Changes.
-
Set the Inactive switch to Active.
Once this policy has been applied to your endpoint/s, any executable called malware.exe will be automatically blocked and quarantined if prompted to run

