Elevate MSI Files on the Network Share
A wizard generated UNC or Network Share Path Elevation Policy elevates .exe files but not .msi files.
When launching an .msi file, the following command line is executed:
C:\Windows\System32\msiexec.exe /i "\\[path-to-network-share]\[file]"
This means that the application is not elevated because the msiexec.exe file is not in the elevated Network Share directory.
This topic details two options for elevating .msi files from a network share.
Option 1
In order to enable elevation for .msi files on the network share, a command line filter can be created and added to the Elevation Policy.
-
In the Verify Privilege Manager, navigate to Admin | Filters.
-
Click Add Filters.
-
From the Platform pull-down menu, select Windows.
-
From the Filter Type pull-down menu, select Commandline Filter.
-
Give this filter a custom name and description.
-
Click Create.
-
Under Settings | Match Type, select Partial Match.
-
In the Command line field, enter the network share path that needs to be elevated (such as
\\share\folder_path).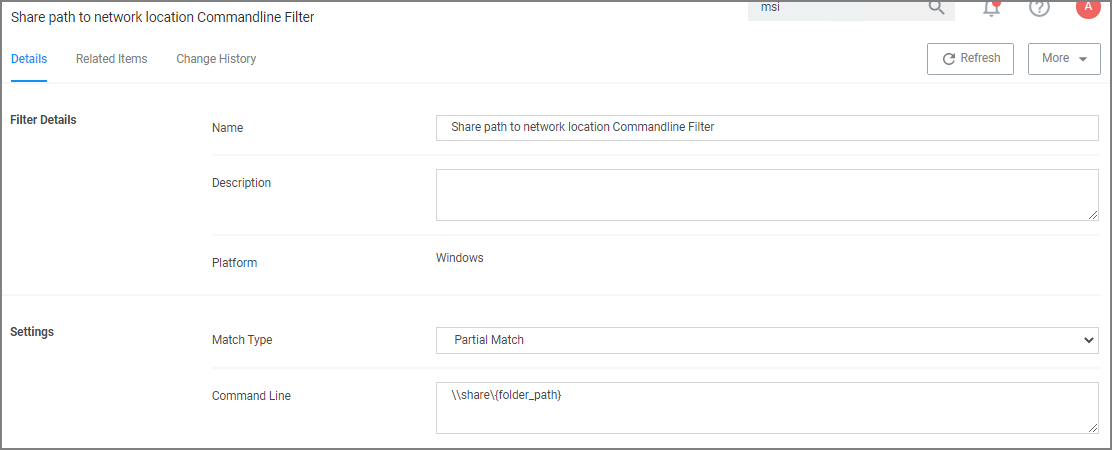
-
Click Save Changes.
-
Navigate to your Elevation Policy. Under Conditions for Application Targets add the command line filter you just created.
Now MSI files in the network share will be elevated.
Option 2
An application control policy can be created that targets "msiexec.exe" and uses a secondary file filter as an include only filter.
-
Navigate to Computer Groups | Windows Computers.
-
Select Application Policies.
-
Click Create Policy.
-
In the policy wizard select Controlling, click Next Step.
-
In the policy wizard select Elevate, click Next Step.
-
In the policy wizard select Run Silently, click Next Step.
-
In the policy wizard select Installer Packages, click Next Step.
-
In the policy wizard select File Upload.
- On the Upload a File modal, Click Choose File.
- Select the file(s) you wish to be targeted.
- Click Upload File.
- On the Manage Application dialog, check File Name.
- Click Create Filter.
- Click Next Step.
-
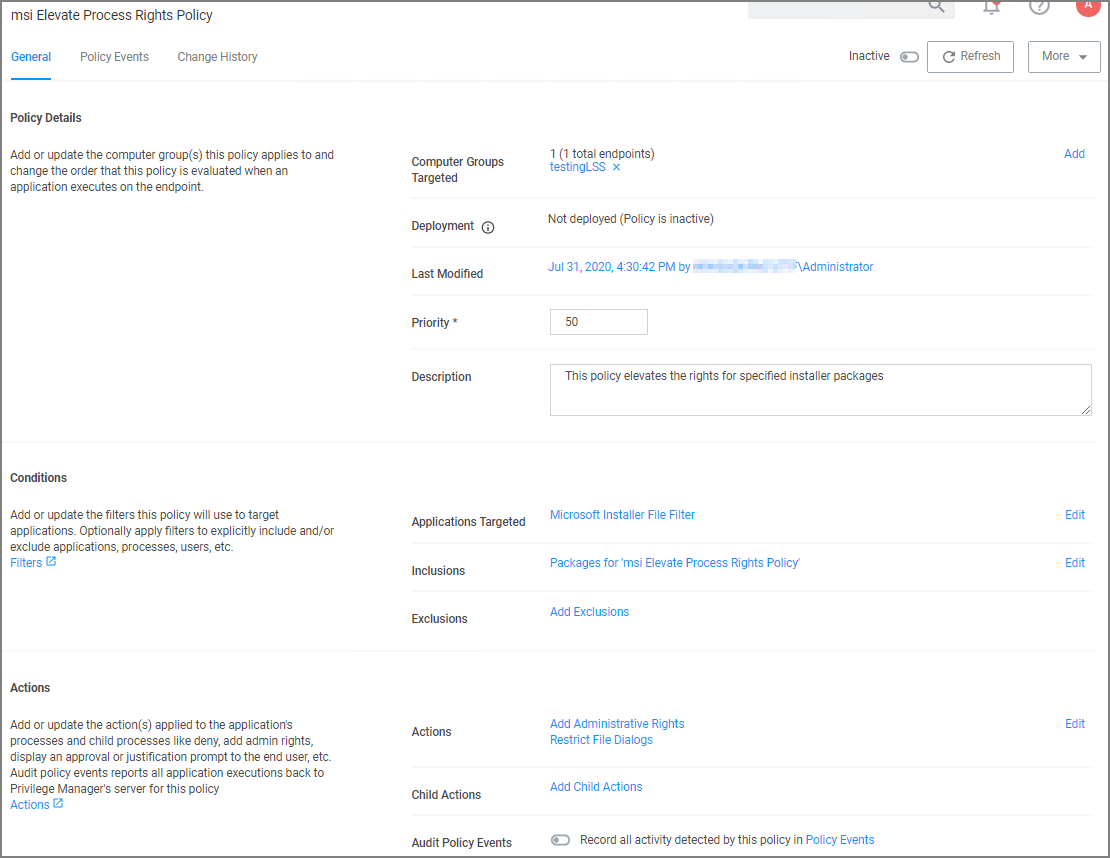
On the Finalize the Policy page, enter a name for your new policy. The policy will be created with a default priority of 50, since it is a silent elevation policy.
-
Click Create Policy.
-
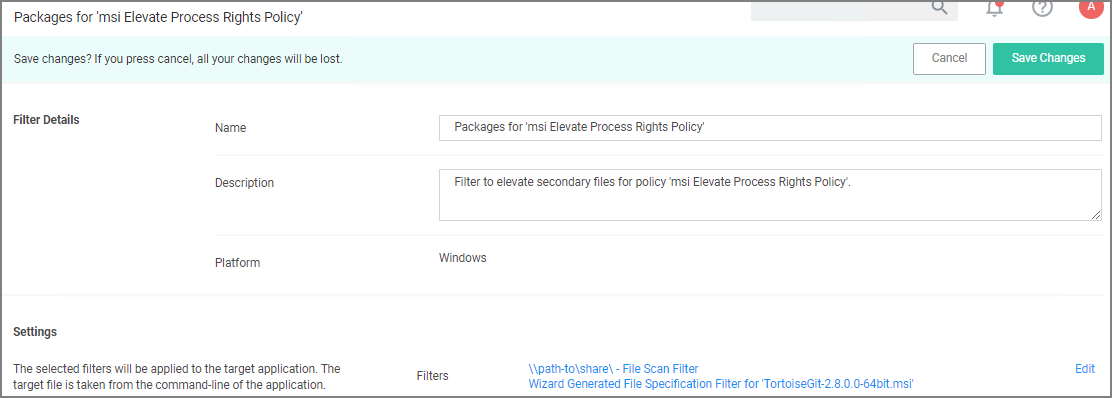
Click the Packages for 'msi Elevate Process Rights Policy' Filter and under Settings search for and add the \share\to-path filter previously created.
-
Click Save Changes.
-
Set the Inactive switch to Active.
MSI files in the network share will be elevated.
Adding the Secondary File Filter created to the Applications Targets under Conditions of the Policy will catch all instances where .msi files are run from \\share\folder_path. Only msiexec.exe will run .msi files, so the Secondary File Filter can be added to an Elevation Policy that has other Application Targets.
An Elevation Policy can be built with this Secondary File Filter as the Application Target and add the built-in Microsoft Installer File Filter as an Inclusion Filter to specifically target msiexec.exe runs an .msi from
\\share\folder_path\.