Adding macOS Agents to a Computer Testing Group
The Policy Configuration examples in the following section will use a Learning Mode Policy that enables us to perform actions (i.e. run applications) on a test computer that Verify Privilege Manager will then pick up. This makes targeting specific applications during policy creation easy.
Creating a macOS Test Computer Group
To create a Monitoring (or Learning Mode Policy) on your Mac, begin by
-
Creating a macOS based test computer group:
-
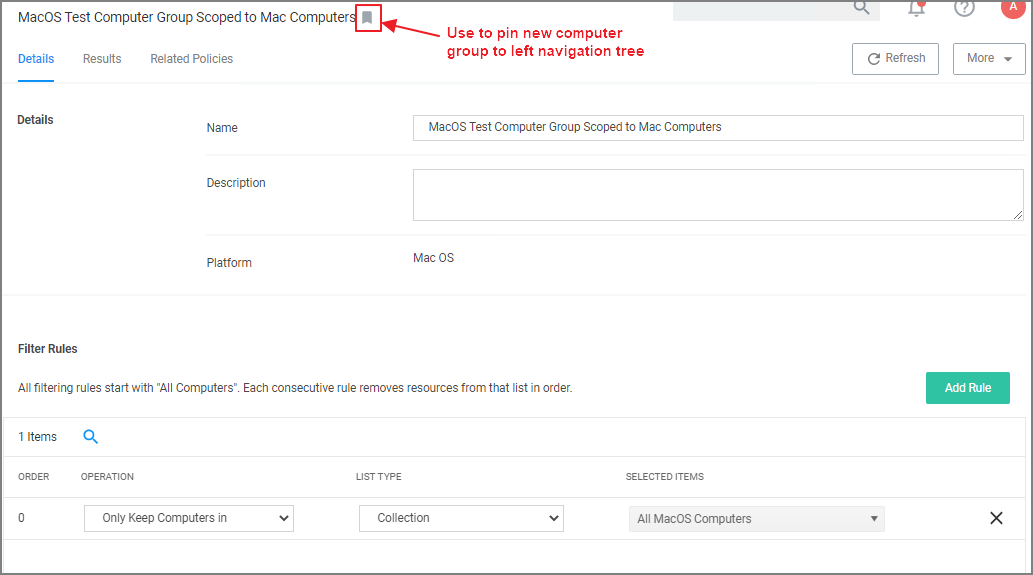
Navigate to Computer Groups.
-
Click Create Computer Group.
-
From the Platform drop-down select macOS.
-
Enter a name and description for your new group.
-
Click Create.
-
Add the macOS endpoints you want to be part of the computer group.
-
Click Save Changes.
-
Pin your computer group to the left navigation menu for quick access. Click the bookmark icon next to the computer group name.
-
Setting Up Monitoring Policies for macOS
-
Under your macOS Test Computers Computer Group select Application Policies and click Create Application Policy.
-
From the Policy Wizard select Monitoring and click Next Step.
-
Select Everything and click Next Step.
-
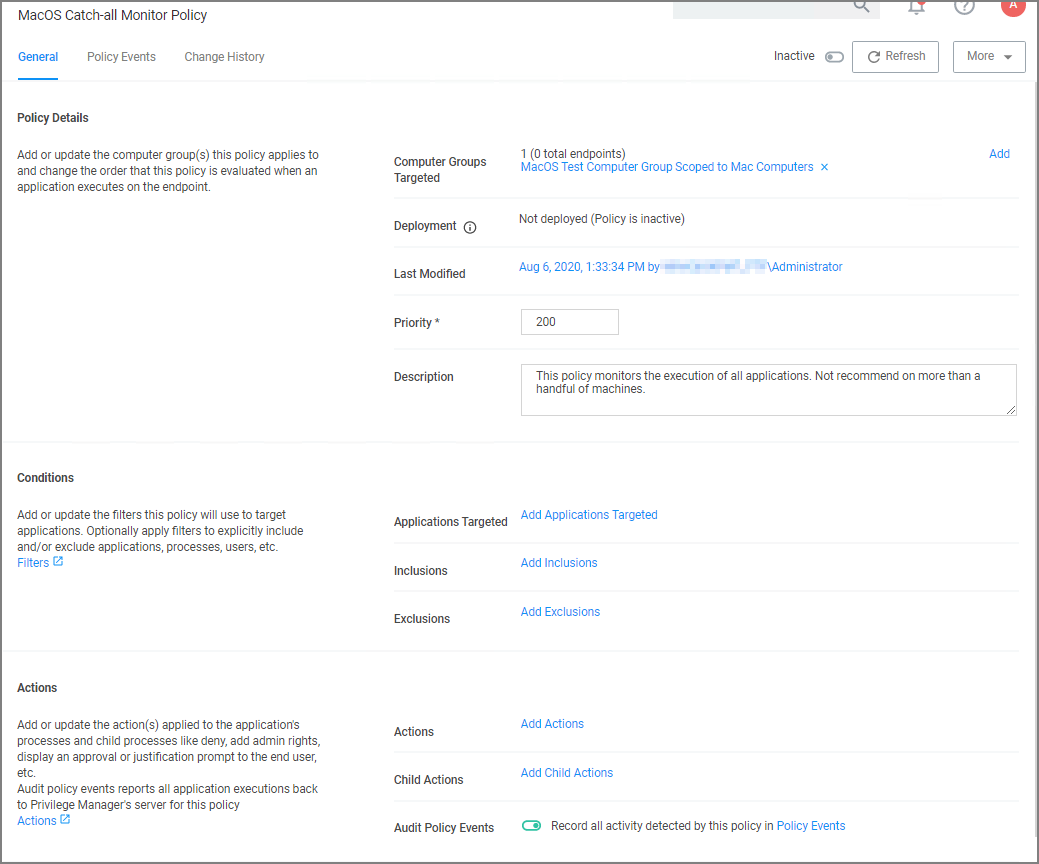
Enter a name, for example macOS Catch-all Monitor Policy.
-
Click Create Policy.
-
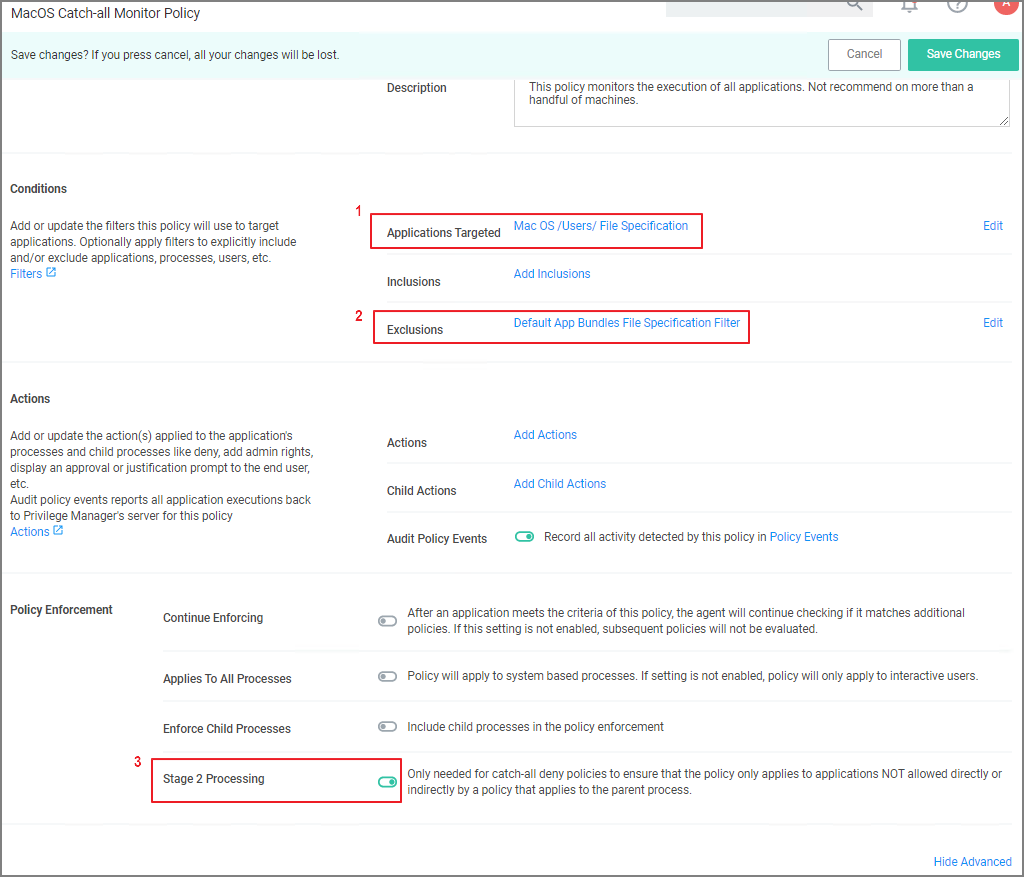
Customize the policies Conditions, Actions, and Policy Enforcement, for example:
-
Under Applications Targeted, click Add Application Target and search for and add macOS/Users/File Specification.
-
Under Exclusions, click Edit and add Default App Bundles File Specification Filter to the exclusion list.
-
Under Show Advanced | Policy Enforcement set the switch for Stage 2 Processing to active an all others to inactive.
-
-
Click Save Changes
-
Set the Inactive switch to Active.
This "Testing Computers" group should only be used for testing specific machines and configuration purposes. It should not be assigned to large groups of computers in your production environment.
Verify that under Actions the Audit Policy Events switch is active.


