macOS Homebrew Installer Support
If you are using Homebrew to manage command line utilities and applications, you need to add the user to the administrator group with a JIT group action and use a policy with additional advanced settings as described below.
With a policy in place, a standard (non-administrator) user is able to run the Homebrew installer by entering the command line found on the Homebrew home page (https://brew.sh) at a Terminal window prompt. After that the installer proceeds and completes successfully, resulting in a Homebrew installation under /usr/local (or /opt/homebrew on Apple Silicon machines) owned by the user (not root).
Refer to this video demonstration.
Not supported on endpoints running the KEXT agent.
Copying any example text below and pasting it into filters, actions, or policies being set up on a server, might introduce special characters in pasted text, which can cause policies to fail.
Creating the Filters Needed
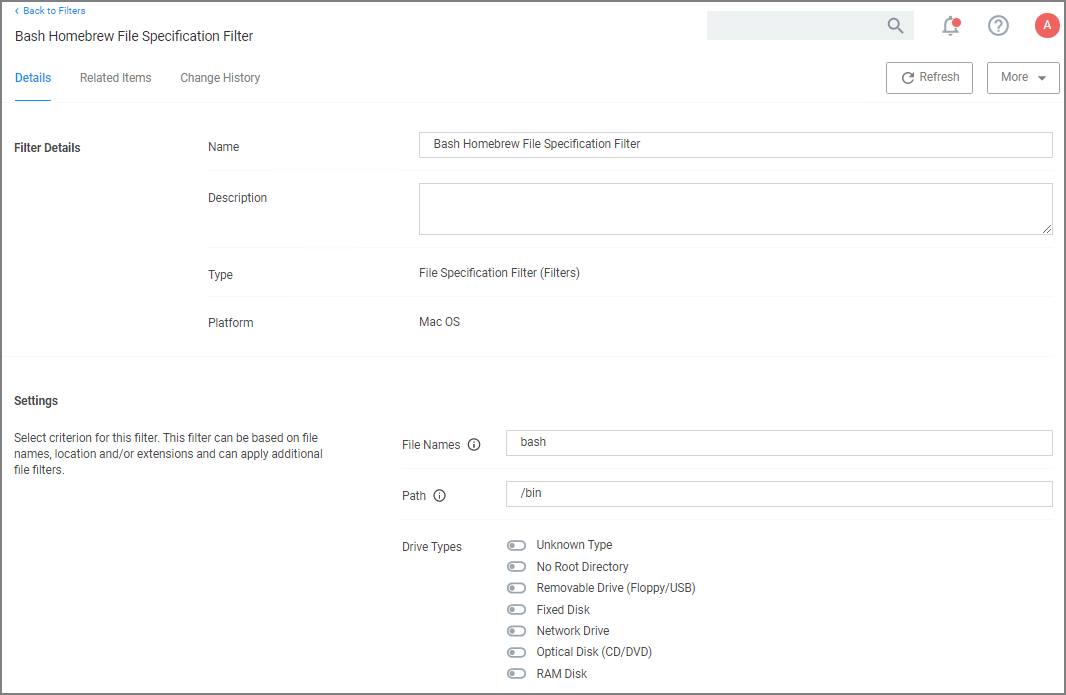
Create a Bash File Specification Filter
This filter will specify the applications targeted.
-
Navigate to Admin | Filters.
-
Click Create Filter.
-
From the Platform drop-down, select macOS.
-
From the Type drop-down, select File Specification Filter.
-
Name the filter and provide a description to reflect the purpose, for example Bash Homebrew File Specification Filter.
-
Click Create.
-
Under Settings | File Names, enter bash.
-
For Path, enter /bin.
-
Click Save Changes.
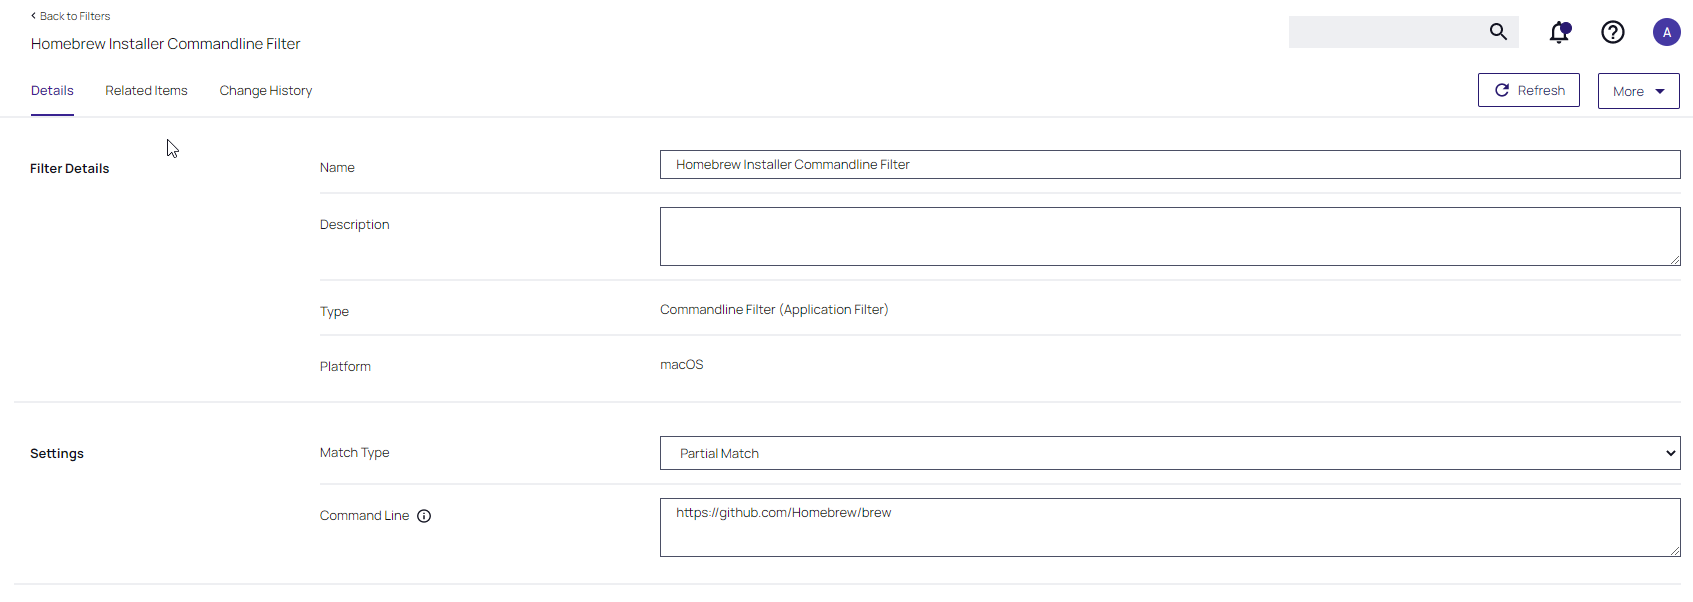
Create a Homebrew Installer Commandline Filter
This filter will be added as an inclusion filter.
-
Navigate to Admin | Filters.
-
Click Create Filter.
-
From the Platform drop-down, select macOS.
-
From the Type drop-down, select Commandline Filter.
-
Name the filter and provide a description to reflect the purpose, for example Homebrew Installer Commandline Filter.
-
Click Create.
-
Under Settings | Match Type, select Partial Match.
-
For Command Line, enter
https://github.com/Homebrew/brew. -
Click Save Changes.
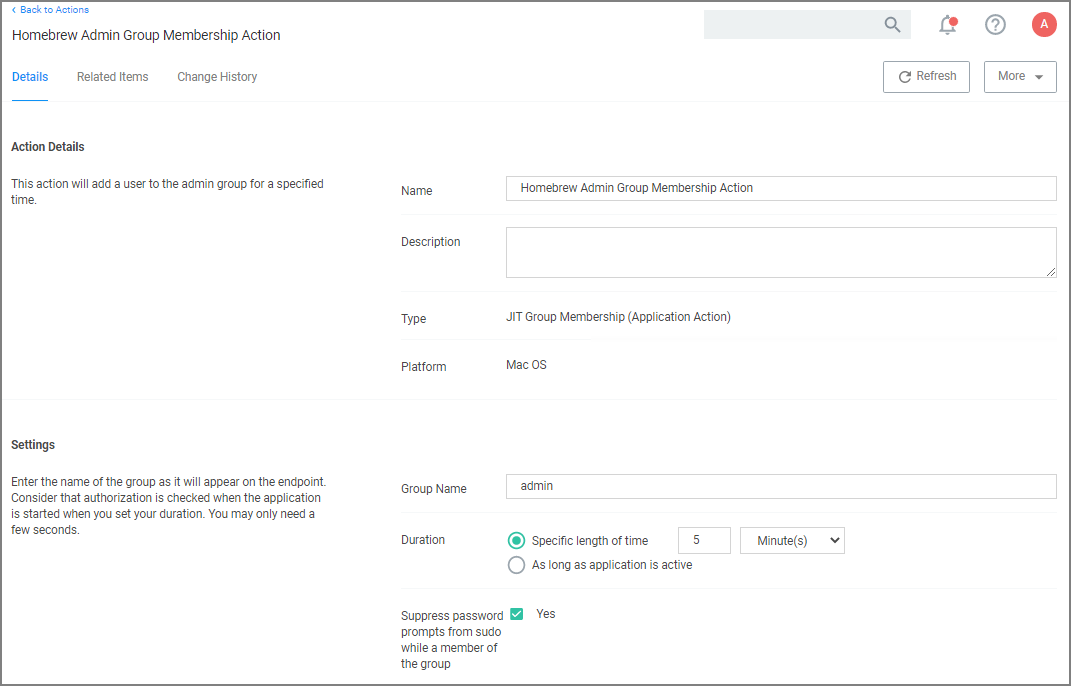
Creating the Homebrew Admin Group Membership Action
This action will be added under Actions section of the policy.
-
Navigate to Admin | Actions.
-
Click Create Action.
-
From the Platform drop-down, select macOS.
-
From the Type drop-down, select Just-in-Time Group Membership Action.
-
Name the Action and provide a description to reflect the purpose, for example Homebrew Admin Group Membership Action.
-
Click Create.
-
Under Settings | Group Name, enter admin.
-
For Duration keep the default 5 min setting.
-
For Suppress password prompts from sudo while a member of the group set the checkmark to change to yes.
-
Click Save Changes.
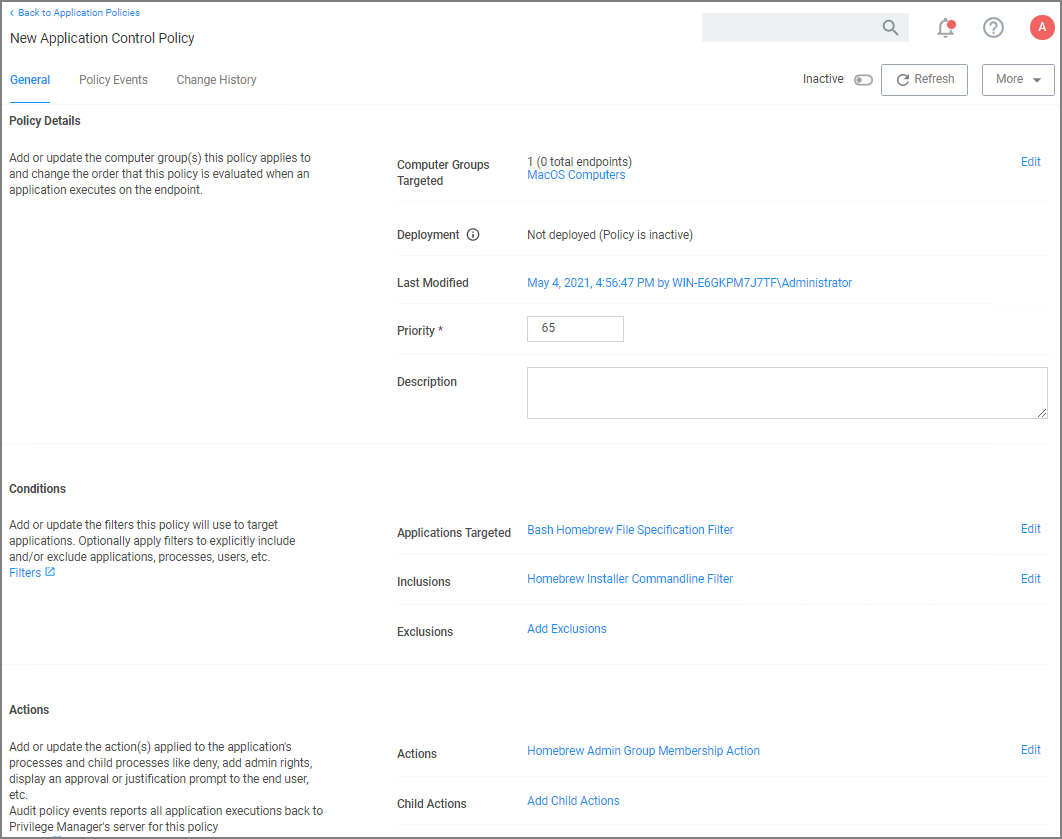
Creating the Homebrew Installation Policy
-
Navigate to your macOS computer group and select Application Policies.
-
Click Create Policies.
-
Select Skip the wizard, take me to a blank policy option.
-
Name the policy, for example Homebrew Installation Policy.
-
Click Create Policy.
-
Under Conditions | Applications Targeted, click Add Application Targeted.
-
Search for and add the Bash Homebrew File Specification Filter previously created.
-
Click Update.
-
Click Inclusions.
-
Search for and add the Homebrew Installer Commandline Filter previously created.
-
Click Update.
-
Under Actions, click Add Actions.
-
Search for and add the Homebrew Admin Group Membership Action previously created.
-
Click Update.
-
Click Save Changes.