Secured Computer Groups
Secured Computer Groups allows Verify Privilege Manager Administrators to create subgroups within the macOS, Linux/Unix, and Windows OS based scopes. These subgroups can target specific geo locations, like all systems based on a specific OS in Asia or Europe.
Creating a Secured Computer Group
-
In your Verify Privilege Manager console in the left navigation menu, click Computer Groups.
-
Click Create Computer Group.
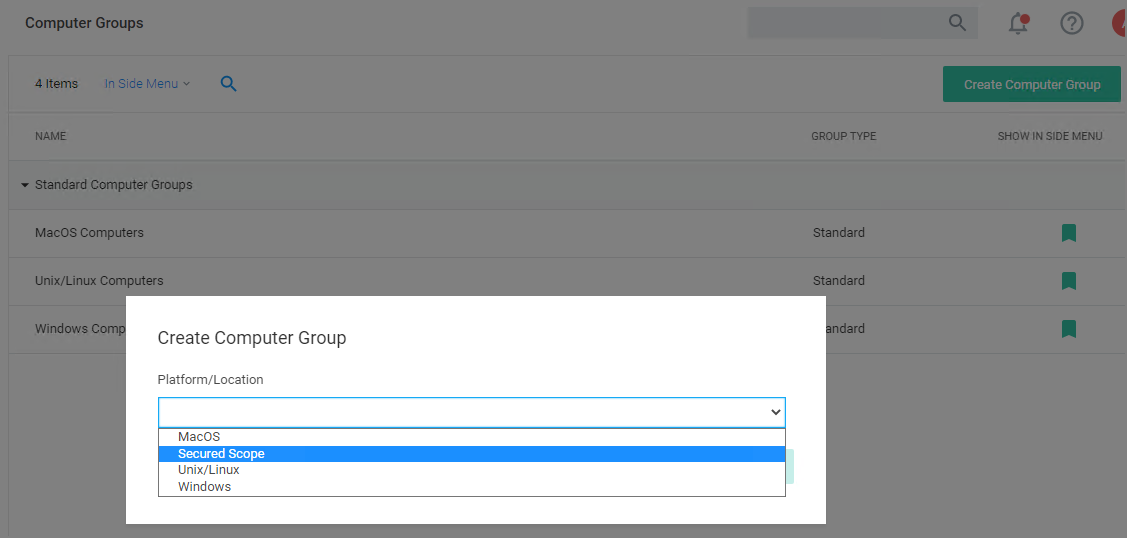
- From the Platform/Location drop-down, select Secured Scope.
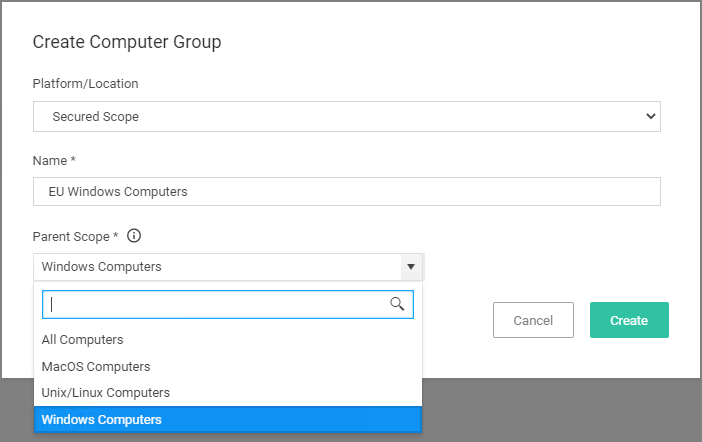
- In the Name field, enter a meaningful name for your use case of this group.
- From the Parent Scope drop-down, select the parent association based on OS Computer Group. Do not select All Computers. The Secured Computer Group is a subset of the parent and has to be scoped to either macOS, Unix/Linux, or Windows Computers.
Once created, the Computer Group page is displayed. By default, the group is added to the left navigation menu of the Verify Privilege Manager console.
Membership Tab
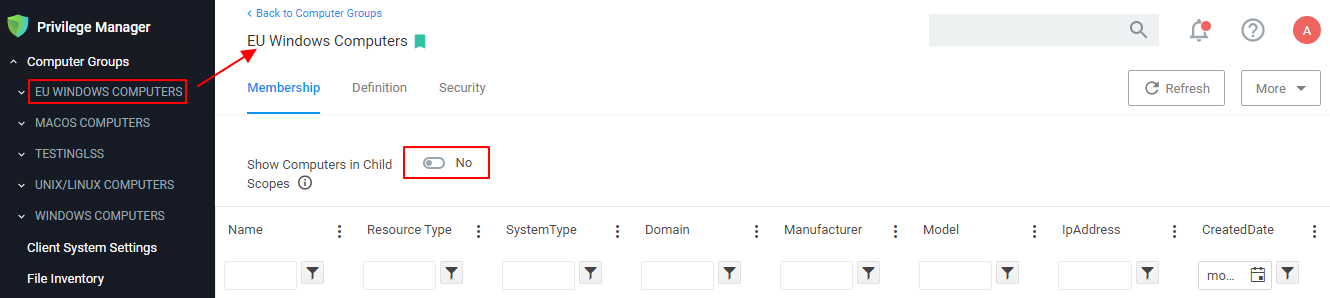
The Membership information will show only the direct members of the group, unless you set the Show Computers in Child Scopes switch to Yes.
Definition Tab
On the Definition tab, you can further define the subset of the group.

Under Details, the Name and Description are reflected as specified when the Computer Group was created.
The Type is Custom Security Scope Collection (dc).
The Subset Type can be changed via drop-down, it defaults to Computer Group, but for definition purposes a Verify Privilege Manager Admin can choose from the options listed in the table below. Based on Subset Type selection the last definition field changes:
| Subset Type | Specification |
|---|---|
| Computer List | Computers - Click Add to select computers to be added from a picker. The picker will show all computers in the environment, only those that are members of the parent collection can be members of this set. |
| Computer Name | Name - Enter the names for the computer to be added. You can type in the exact name of a computer or append/prepend a '%' as a wildcard. |
| Scope | An AD domain to be selected from the list of known AD domains. |
| Security Group | A Group to be selected from a list of resources based on a search by Name option. |
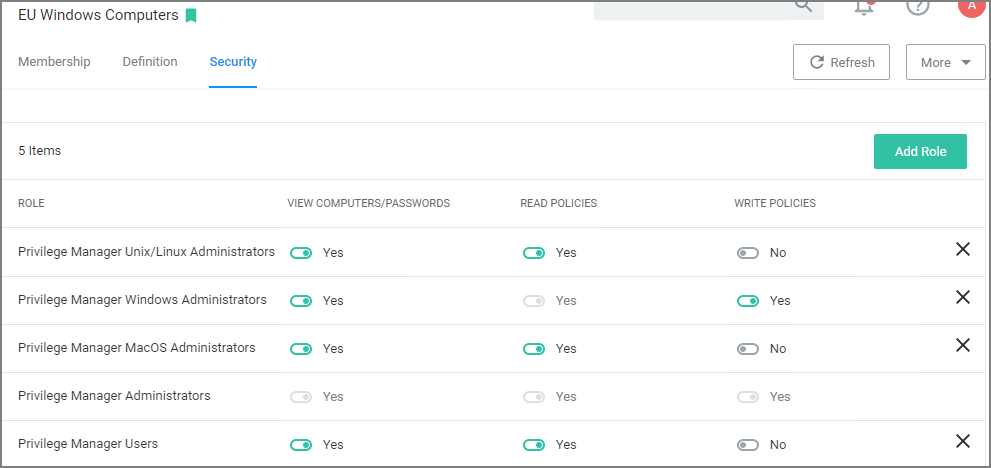
Security Tab
On the Security tab, roles can be turned on and off for various CRUD operations.
In order for the View Computers/Passwords options to be enforced correctly and to use what is defined in the scopes, navigate to Admin | Security and open the Configuration tab to set the Resource Security to Secured Computer Groups. Refer to Security Configuration Tab on the Security topics page under the Admin Menu section.
If you are using Verify Privilege Vault as the vault, roles and permissions as defined in Verify Privilege Vault control who can see which secrets. The Secured Computer Group Security settings only apply to data within Verify Privilege Manager.
Priority Considerations
When setting up Secured Computer groups and policies, the priority settings of those policies needs to be well considered between the parent and child computer groups.
An example of conflicting policies is where a Windows Computer Group may have a policy to block notepad.exe and its child Windows Computer Group has a policy that requires an approval for notepad.exe. In order to make this work, the child Windows Computer Group policy needs to have a higher priority than the parent Windows Computer Group policy. This ensures that the computers in the child group request approval when Notepad is selected and the computer in the parent group blocks Notepad when it is selected.