Configure Azure Active Directory
As a prerequisite for running the Verify Privilege Manager Mobile Console, you must configure Azure Active Directory integration with Verify Privilege Manager. Refer to Setting Up Azure Active Directory Integration in Verify Privilege Manager.
Once Azure AD integration for your Verify Privilege Manager instance is configured, follow these steps to add an additional Redirect URI for the mobile application to the Azure AD application registration:
-
Open the Azure Management Console.
-
Navigate to your Active Directory instance.
-
Select App registrations from the menu.
-
Click the Owned applications tab.
-
From the list under Display name select your Verify Privilege Manager registration.
-
Either select the Redirect URI links or the Authentication menu.
-
Select Add a platform.
-
Select Mobile and desktop applications.
-
Set the Redirect URI to exactly
http://ArelliaMobileClient/. There are two access points to do this either via:- Redirect URI or
- Authentication menu.
The following table shows the steps you will see for each option:
accessed via Redirect URI link accessed via Authentication menu 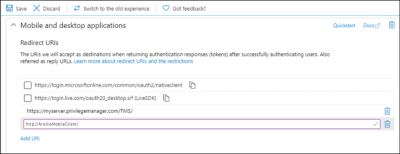
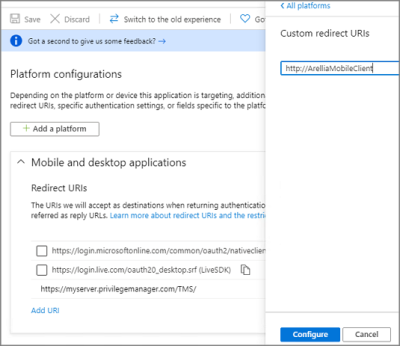
1. Click Add URI. 1. Enter http://ArelliaMobileClient/.2. Enter http://ArelliaMobileClient/.2. Click Configure. Important: The URI value needs to exactly match
http://ArelliaMobileClient/. -
Click Save.


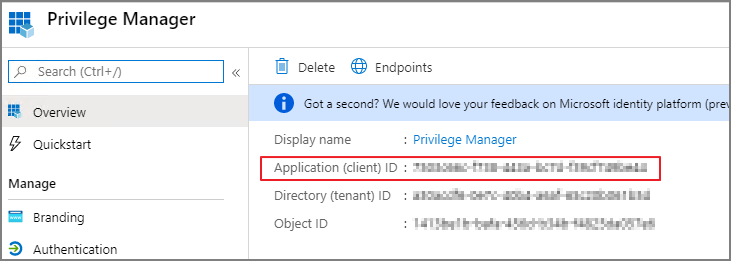
On the App registrations page under Owned applications, take note of the Application (client) ID. You will need to use the client ID when you Configure the Mobile Console in Verify Privilege Manager.