Data Uploader Setup Steps
Verify Privilege Vault Analytics (VP-VA) processes event data from Verify Privilege Vault using a data upload.
Integrating Verify Privilege Vault and VP-VA requires an Integration Key. This key:
- contains the secret access key and other parameters for uploading data to IBM Security VP-VA.
- is encrypted for protection in transit.
- is encrypted and saved when entered into Verify Privilege Vault using standard Verify Privilege Vault encryption (AES-256 and DPAPI/HSM if configured).
- can never be loaded again through the UI, but can be updated if the linked VP-VA account needs to be changed.
Version 10.4 and Later, and Cloud
For Verify Privilege Vault Installed Version 10.4 and for Verify Privilege Vault Cloud, event data is uploaded to VP-VA via queues and micro-loading, and is closer to real-time. Prior versions of Verify Privilege Vault data upload followed the more typical data warehouse design of file upload and small batch-loading.
Use these steps to obtain the Integration Key from VP-VA that will be used by Verify Privilege Vault to authenticate and upload data to VP-VA:
-
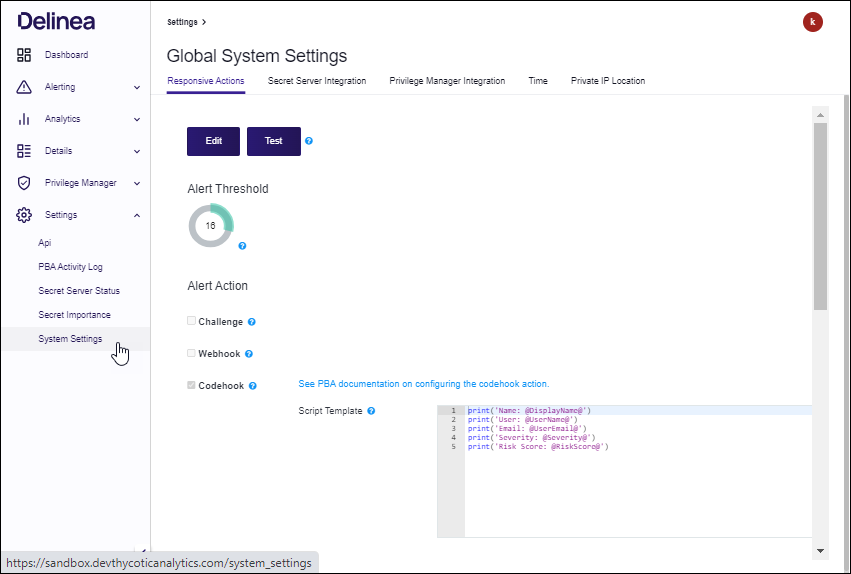
Log into your VP-VA instance and select Settings in the left navigation panel, then select System Settings.
-
From the Global System Settings page, select the Verify Privilege Vault Integration tab.

-
Click View Integration Key. If you are prompted to specify whether Verify Privilege Vault is on version 10.4.000000, click Yes.
-
Copy the Integration Key Value.
-
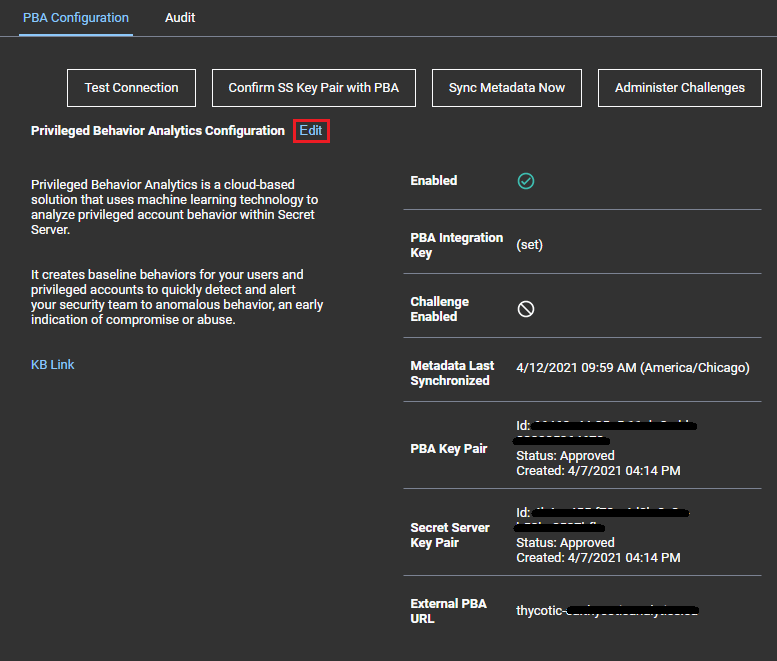
Open Verify Privilege Vault and navigate to Admin > See All > Tools & Integrations > Privileged Behavior Analytics.

-
On the VP-VA Configuration page, click Edit.
-
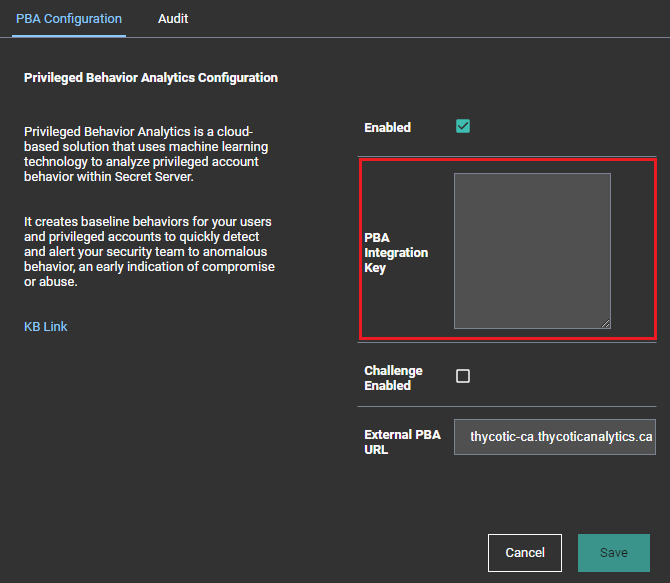
Check Enabled to enable Verify Privilege Vault Analytics.
-
Paste the VP-VA Integration Key that you copied in step 4.
-
Check Challenge Enabled to enable Verify Privilege Vault Access Challenges. See the Access Challenges article for further information.
-
Input the External VP-VA URL. This is the URL of your Verify Privilege Vault Analytics cloud instance. It is set automatically by the integration key but may be overridden. It is used for Single Sign On, redirecting to VP-VA from the Tools menu, and on the Access Challenges page to create links to the VP-VA events that spawned Access Challenges.
-
Set the Metadata Interval (Installed Only). The frequency that metadata is uploaded to VP-VA.
- The recommended interval is at least 60 minutes.
- The minimum interval is 5 minutes.
- Metadata frequency should vary based on how often new Users and Secrets are added in Verify Privilege Vault; typically it should not need to be less than 60 minutes.
- For Cloud, this setting is unavailable and defaults to 60 minutes.
-
Click Save to confirm the configuration.
-
When the configuration is saved and VP-VA is set to enabled, the configuration will be validated. It can also be manually validated by clicking Confirm SS key Pair with VP-VA.
Special Case: VP-VA Already Enabled
If VP-VA was already enabled in Verify Privilege Vault prior to upgrading to version 10.4.000000 or later, you must copy the integration key from VP-VA to Verify Privilege Vault in order to enable Single Sign On.
Single Sign On requires a key exchange in order for VP-VA to use Verify Privilege Vault as an identity provider, and a new integration key is provided with VP-VA’s public key in order to initiate this key exchange.