Global Configuration Settings
Using global configuration settings, a user can set default values to be used for new local connections, connections made directly from Verify Privilege Vault, and connections made when Verify Privilege Vault Remote is acting as a protocol handler.
Global configuration settings can be changed (over-ridden) on individual connections, and those override settings will not be impacted by subsequent changes to global configuration settings.
Global configuration settings do not impact existing local connections, even if they were exported and imported.
Connections from Verify Privilege Vault do not support all available parameters. In such cases the default parameters are substituted.
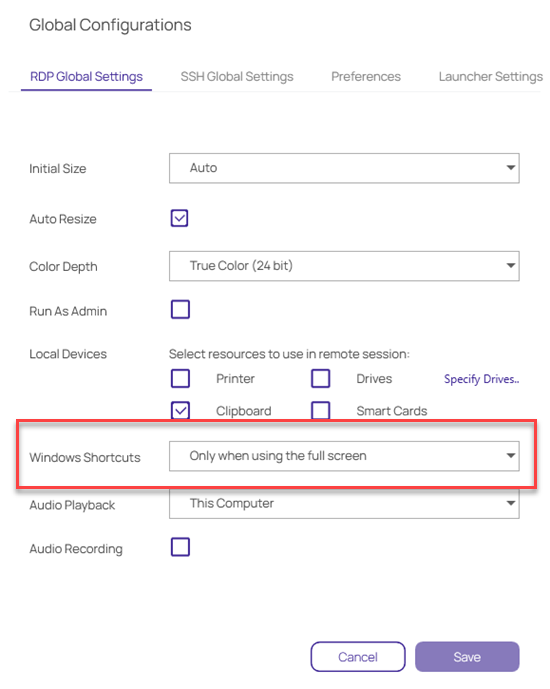
On the Configuration menu, click Global Configurations. The Global Configurations dialog box opens to the RDP Global Settings tab, where you can configure settings such as Desktop Size, Color Depth, and Local Devices.
Windows Shortcuts
The Windows Shortcuts field can be set individually or in bulk and offers the following three options:
-
On this computer: Windows shortcuts will execute on the local computer.
-
On the remote computer: Windows shortcuts will execute on the remote computer.
-
Only when using the full screen: Windows shortcuts will execute on the remote computer only when you are in full-screen mode.
On the SSH Global Settings tab, you can configure settings such as Font and Font Size. You can choose one of the Color Presets or you can create a Custom color scheme by changing the individual values for Background Color, Foreground Color, Bold Color, or Underlined Color.
These settings will be applied to all of your vault connections. If you would like to adjust the settings for local connections, see Editing Local Connections .

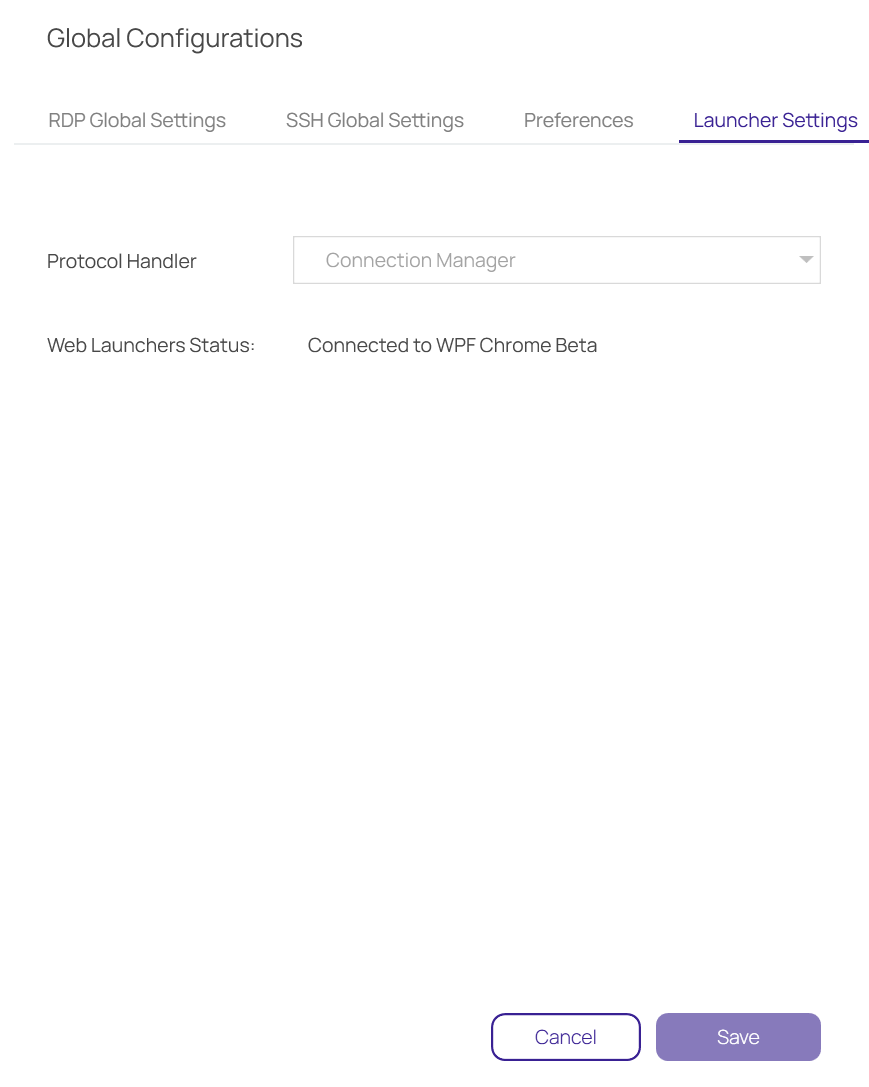
On the Launcher Settings tab, administrators can choose to use the Verify Privilege Vault Remote protocol handler or the legacy protocol handler, Verify Privilege Vault Launcher. Users can also switch between the two protocol handlers. If both protocol handlers are installed and the administrator uninstalls one of them, the other protocol handler will register itself as the protocol handler for all users on installation.
In addition to this, you will see the web launcher connection status. This is useful if you are launching secrets created with the Web Password Filler template.
Globally Enforced Verify Privilege Vault Settings
The following settings can be configured in Verify Privilege Vault and will be applied globally for any Verify Privilege Vault Remote application that is connected to it.
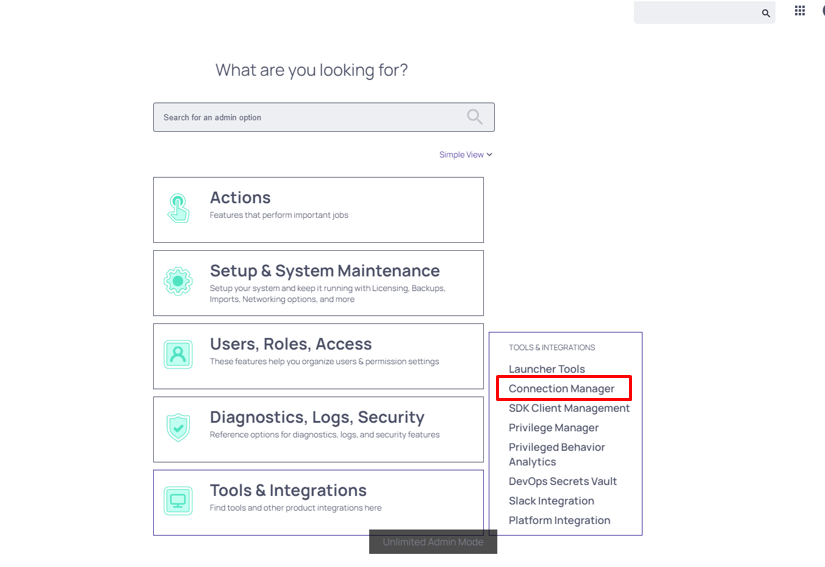
To access this in Verify Privilege Vault:
-
Navigate to Admin | See All.
-
Select Tools & Integrations.
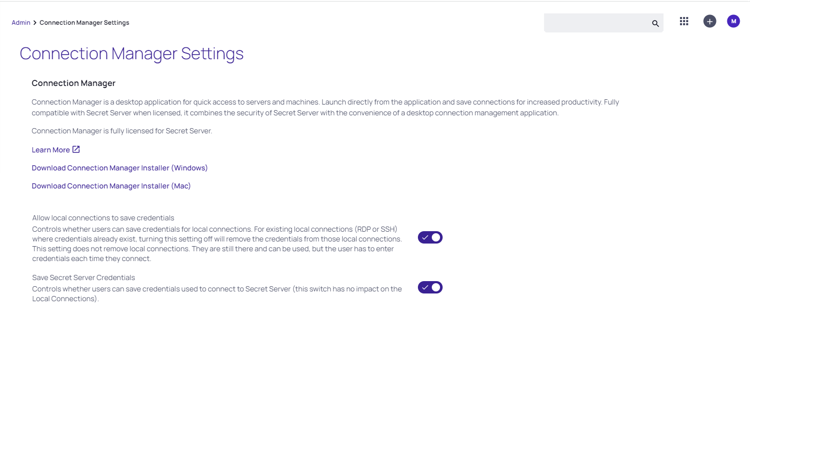
These options are by default enabled:
-
Allow Local Connections – Allows or disables saving credentials for any Local Connections. The default is Yes.
-
Allow Saving Credentials - Allows or disables saving credentials for any Verify Privilege Vault connections. The default is Yes.
If Verify Privilege Vault Remote is connected to multiple Verify Privilege Vault Instances, and those instances have different values for these new settings, then Verify Privilege Vault Remote will always use the more secure option set for security purposes. For example, if Connection1 allows Local Connections, and Connection2 does not allow Local Connection, then Verify Privilege Vault Remote will not allow Local connections at all.
If "Allow Local Connections" is set to "off" and user imports local connection(s), credentials are not imported but the local connections are created.
If you already have Local Connections saved, and the Allow Local Connection option is disabled, then the next time the Verify Privilege Vault instance is connected to the Verify Privilege Vault Remote instance we will prompt the user that the Local Connections will be deleted. If they agree, then Verify Privilege Vault connects and the local connections are deleted. If they say No, then we prevent Verify Privilege Vault from connecting.
The behavior is the same for saving credentials when setting the Allow Saving Credentials flag.
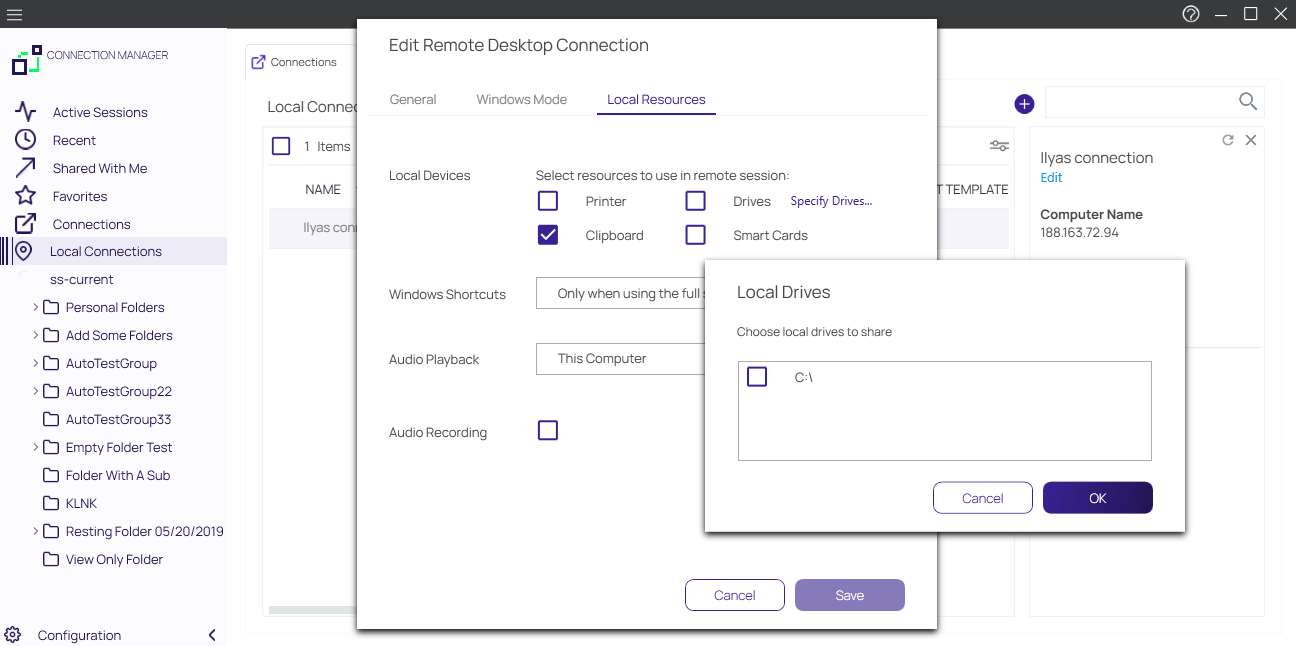
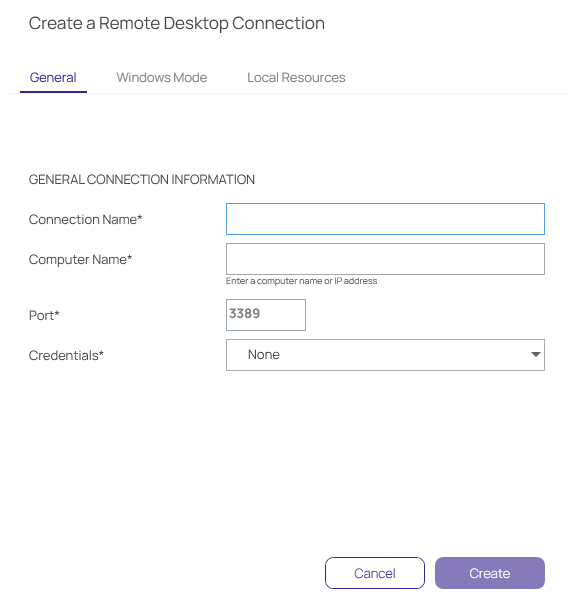
When creating or editing a Remote Desktop Connection, you can select and map the local drives you wish to share. On the Local Resources tab, click Drives and then click Specify Drives. Select the drives you wish to map and deselect any drives you don't want to map. If you choose to map all available local drives, the Drives box displays a check mark. If you decide to map only some of the available local drives, the Drives box displays a dash.