Step 1 - Create a VP-DV Account
Video Guide

Click to open the video in a new window
Procedure
Your tenant is your Verify Privilege DevOps Vault cloud account and the rights to access it. Signing up qualifies you for a free feature-complete trial version of Verify Privilege DevOps Vault. The trial version is limited to 250 Secrets and 2500 API calls per month. Start by configuring the free version and upgrade when you need more capacity.
To get your tenant:
-
Visit IBM Security's Verify Privilege DevOps Vault Home Page. Click Try It Free and fill out the Verify Privilege DevOps Vault free web form and submit.
-
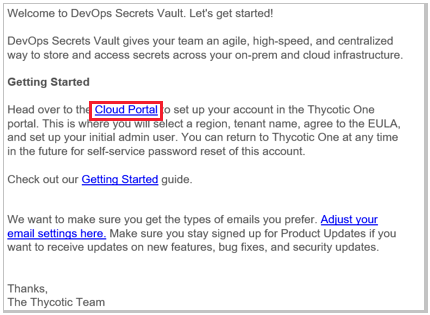
After submitting the form, you will receive an email from IBM Security Sales, with the subject "DevOps Secrets Vault". Click Cloud Portal.
You can wait until you need support to sign up. If you already have a support account because of a previous IBM Security cloud subscription, use your existing account for support. Refer to the Support Services Guide for complete details about our support policy.
-
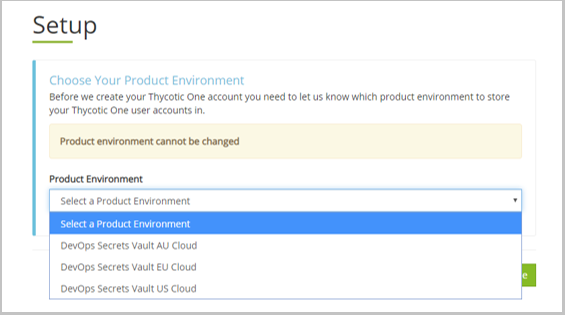
At the Setup dialog, select your Product Environment. The three regions are independent for data sovereignty reasons (like GDPR). All three provide geographical redundancy as follows:
-
secretsvaultcloud.eu (Frankfurt), Active Standby: Ireland
-
secretsvaultcloud.com (US-East), Active Standby: US-West
-
secretsvaultcloud.com.au (Sydney), Active Standby: Singapore
-
-
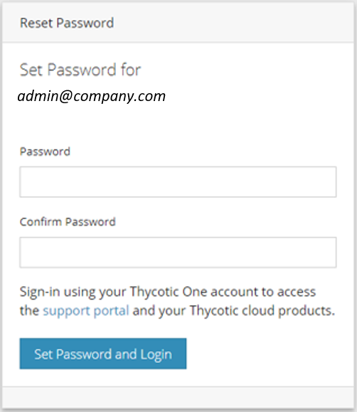
Next you are taken to **Thycotic One** to set a password.
The person setting up the Verify Privilege DevOps Vault tenant will be considered the *initial administrator* andThycotic One will be established as that person's authentication provider. This is to enable IBM Security to help in case the password is lost.
You can set future users as local or use Thycotic One, AWS, Azure or GCP.
Later *Thycotic One can be setup later to enable SSO to an identity provider of your choice using OIDC, or enable 2FA when used as the identity provider. The options are TOTP (such as Google Authenticator) and SMS.
-
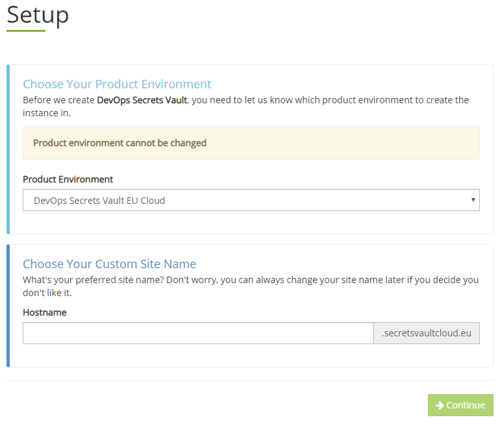
Next, select your Product Environment and supply a Hostname. The hostname is your tenant name.
-
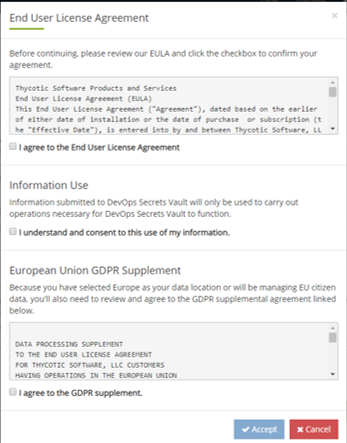
Read and agree to the EULA and GDPR (if applicable).
-
The tenant will be created. VP-DV takes between 5-20 minutes to complete tenant creation. When complete, click Go To Application.
Proceed to Step2 - Download the Command Line Interface (CLI).