Using GSuite as a SAML Provider
When configuring GSuite as a SAML Provider the basic steps to set up the foreign system are the same as provided under the "Setting up a SAML Integration" topic. There are a couple of extra points to note that might not be intuitive enough when following the Google documentation for the SAML setup.
External References
- Google:
https://support.google.com/a/answer/6087519
Clarification of Steps in GSuite
When you are following the recommended steps to create a custom SAML application in GSuite, you will be shown a number of fields that you will need to use when configuring Verify Privilege Manager. GSuite provides a test via their SAML apps | Test dialog. On that page in combination with an option to Download Metadata, the data provided needs to be used to edit/complete the GSuite foreign systems setup in Verify Privilege Manager. It might be best to keep the GSuite app configuration page and Verify Privilege ManagerConsole open in two different browser Windows for easy retrieval of data.
-
Go to your G-Suite app that you have configured in your browser and view the details.
-
Your browser URL, which will be similar to this
https://admin.google.com/u/1/ac/apps/saml/241286142839, contains your AppID, which is the number string at the end of the URL, 241286142839 from this example.Copy your AppID from your URL. It needs to be added on the foreign systems page.
-
From the download metadata page, copy your Entity ID and and download the Certificate. You will need to upload this certificate in Verify Privilege Manager later.
-
For the ACS URL field, enter https://your-server.privilegemanagercloud.com/Tms/saml2/acs.
-
For the Entity ID field, enter PrivilegeManagerServiceProvider.
-
Leave the Start URL blank.
-
Check the Signed response box.
-
For the Name ID Format field, select Email.
-
For the Name ID field, select Basic Information | Primary email.
Steps in the Verify Privilege ManagerConsole
-
In Verify Privilege Manager, navigate to Admin | Foreign Systems and create a new SAML provider.
-
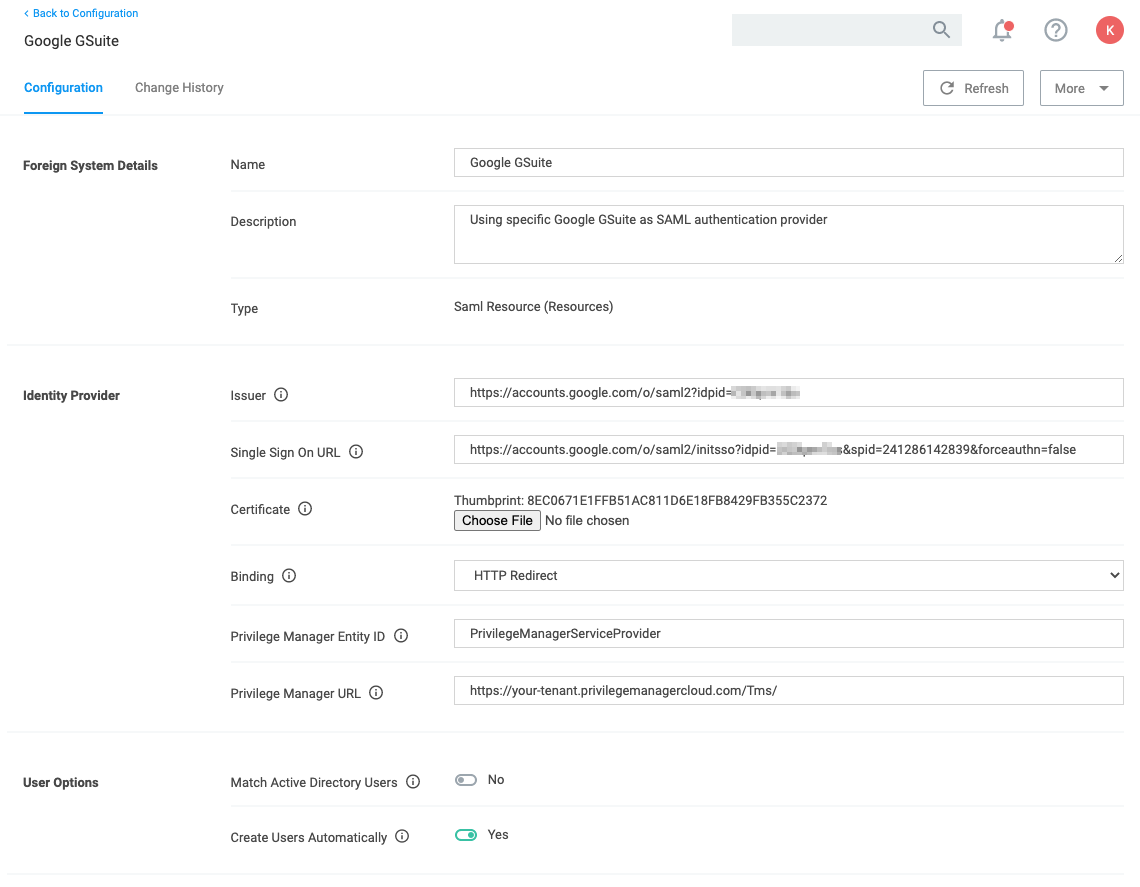
Enter values, for
- Issuer, enter the Entity ID that was provided from your GSuite custom app.
- Single Sign On URL, enter the browser URL containing the AppID string as
https://accounts.google.com/o/saml2/initsso?idpid=<idpid>&spid=<AppID>&forceauthn=false.- Replace
<AppID>with your AppID value from step 2 under "Clarification of Steps in GSuite". - Replace
<idpid>with your application's Entity ID from step 3.
- Replace
- Certificate, upload the downloaded certificate via Choose File.
-
Verify the page contains all the required data, refer to this example:
Next Step - Authentication Provider
To enable this new SAML provider to be used from the Login page, visit the Authentication tab and select your GSuite Foreign System from the listed providers. Refer to Managing Auth Providers.
After saving or enabling authentication providers, you may notice a short delay of unresponsiveness in your browser as the Verify Privilege Managerapplication pools restart automatically.