Users
Administrator users can create and edit Verify Privilege Manager users and assign and remove roles for these users.
There are three types of users: Thycotic One
- users - these are only available in cloud environments and are manually added.
- API Users - these are available for the public API implementation.
- Standard Users - these are users manually added by an administrator after the initial installation of Verify Privilege Manager.
- Federated Users - these are users, whose identity is linked across multiple security domains. They authenticate with one and can access resources in the other.
How to Manually Add Thycotic One Users
To manually add users to your Verify Privilege Manager cloud instance, follow these steps:
-
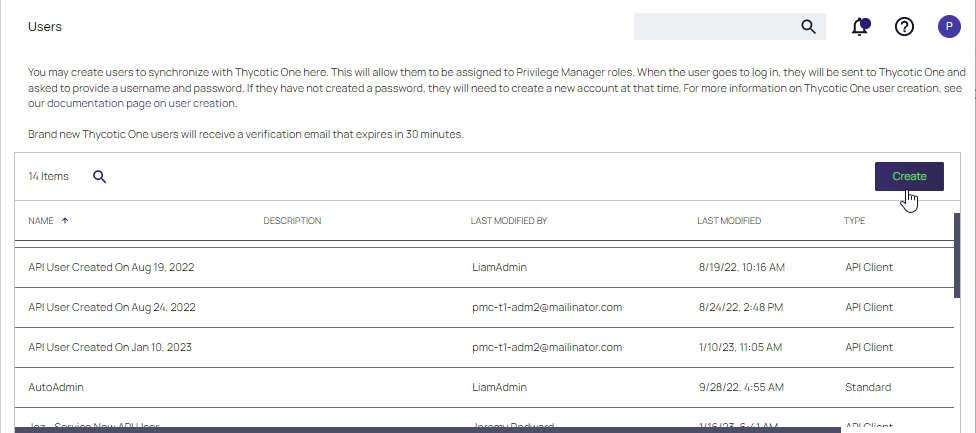
Navigate to Admin | Users. Click Create.
-
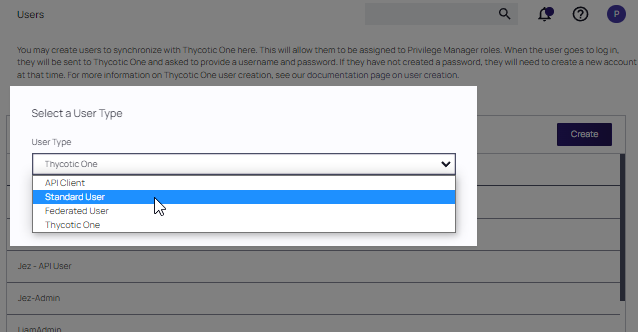
At the Select a User Type dialog, select Thycotic One as the user type and click Create.
-
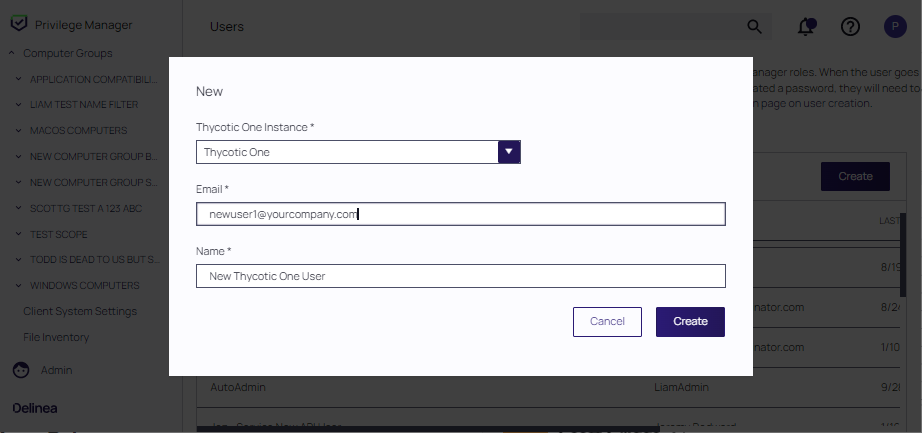
The New dialog displays. Provide information for the new user.
- From the Thycotic One Instance drop-down, search for and select your instance for the new user.
- Enter the Email and Name of the new Thycotic One user in the respective fields.
Click Create.
How to Manually Add Standard Users
Standard users can view and edit their own accounts, such as password updates, but can't create new users or delete their own user.
-
Navigate to Admin | User. On-premises instances see a note that Thycotic One users can only be created if a Thycotic One Foreign System is configured.
-
Click Create.
-
From the User Type drop-down, select Standard User and click Create.
-
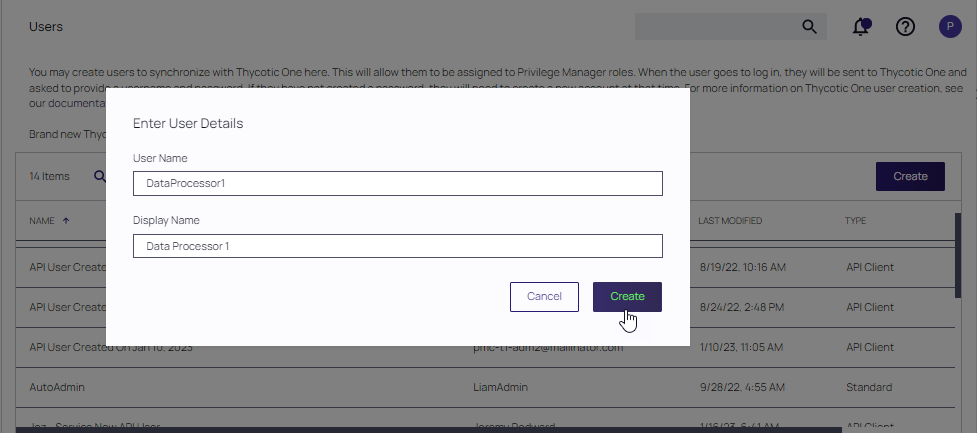
On the Enter User Details modal, enter the User Name and the Display Name. Click Create.
-
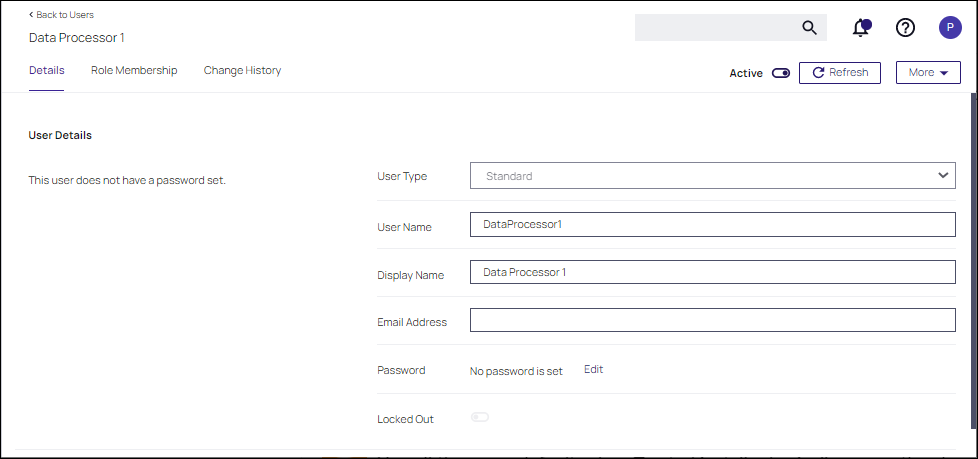
On the newly created User Details page, supply a user type, user name, display name, email address, and password (click Edit_ to define). Locked Out is used to reset the user account if the user becomes locked out.
Click Save Changes.
The user is now active in the system and you may edit the user details.
How to Manually Add API Client Users
API Client users can view and edit their own accounts, such as password updates, but can't create new users or delete their own user.
-
Navigate to Admin | User. Click Create.
-
From the User Type drop-down select API Client and click Create.
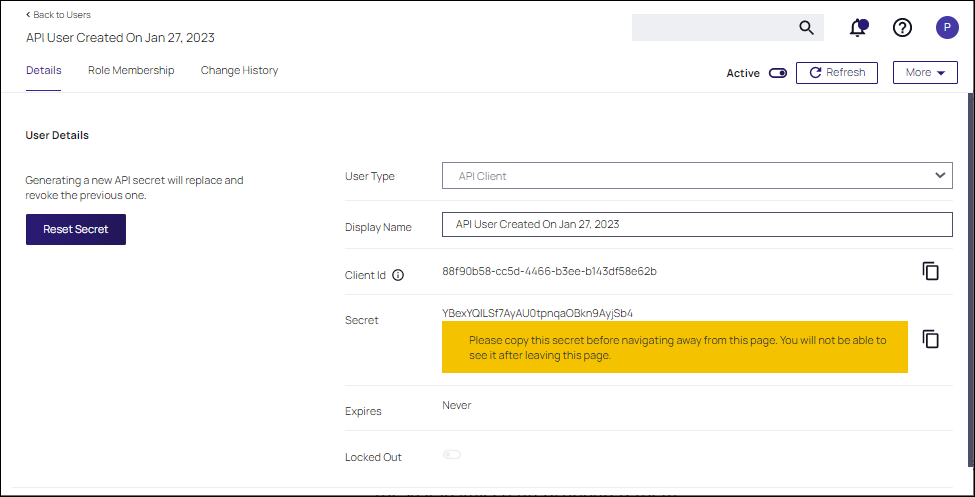
API Client users are by default created with a date and time reference when the user was added. If you wish, you can modify the display name. The newly create user is automatically set to active on creation. Prior to navigating away from the page, make sure to take note of the Client ID and copy the Secret into your vault.
Make sure the API user is a member of a role, the role depends on what you need the API to do.
Use Reset Secret to generate a new secret for this user, it invalidates the old secret you copied to the vault. Once you click Reset Secret you need to confirm the action. The new secret will be shown until you navigate away from the page. All changes need to be saved to take effect.
Editing, Deleting, and Exporting a User
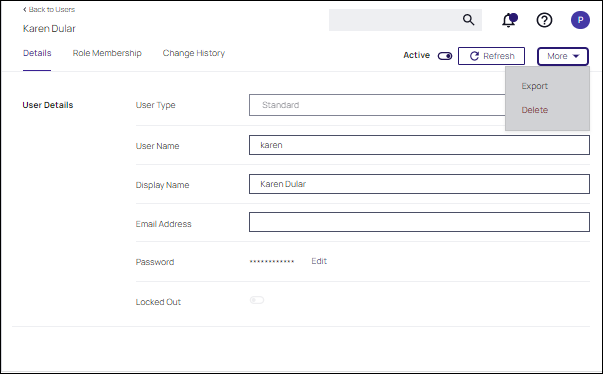
Select an existing user on the Users page. The User details page displays, where you can:
- Edit User Details.
- Select Delete at the More pull-down to delete the user.
- Select Export at the More pull-down to download a ZIP file of the user and children.
Thycotic One user accounts created prior to v11.4.0 need updates to their XML in order to have the Delete option available in the user interface. Refer to Deleting a Thycotic One Account (pre v11.4.0).
Role Membership
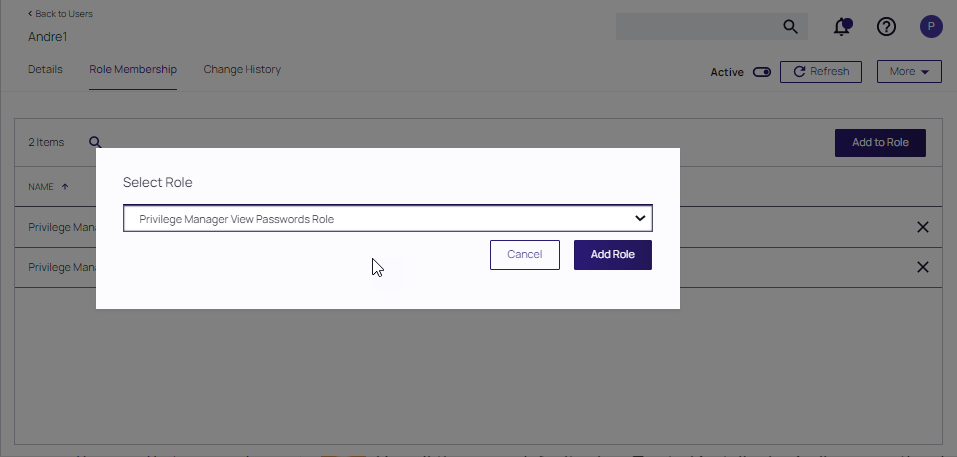
The Role Membership tab allows administrators to verify existing role memberships for any given Verify Privilege Manager user. Administrators can also remove any roles via the X on the table grid and add users to a role via Add to Role options.
- Click Add to Role
- Select a role at the Select Role drop-down and click Add Role.
