Using Hardware Security Modules
HSM Requirements
Each HSM must provide support for these algorithms:
For CNG:
- RSA 4096: Support for RSA with 4096-bit keys is required. The HSM must also support RSA for encryption and decryption, in addition to signing.
-
Padding Type: The HSM must support one of the following for RSA encryption:
- PKCS#1 v1.5 padding
- OAEP padding
-
CNG API Calls:
-
NCryptCreatePersistedKey
-
NCryptDecrypt
-
NCryptDeleteKey
-
NCryptDeriveKey
-
NCryptEncrypt
-
NCryptEnumStorageProviders
-
NCryptExportKey
-
NCryptFinalizeKey
-
NCryptFreeBuffer
-
NCryptGetProperty
-
NCryptImportKey
-
NCryptIsAlgSupported
-
NCryptOpenKey
-
NCryptOpenStorageProvider
-
NCryptSecretAgreement
-
NCryptSetProperty
-
For PKCS #11:
AES 256: Support for AES 256-bit keys is required. The HSM must also support a CKM_AES_CBC_PAD mechanism for encryption and decryption and the slot must be a hardware slot.
Additionally, closely follow the requirements and recommendations of the HSM vendor for things such as minimum latency, redundancy, and operating environment.
Compatible HSMs
Verify Privilege Vault supports any HSM that can be configured with Microsoft's Cryptography Next Generation (CNG) provider or Public-Key Cryptography Standards #11 (PKCS #11). CNG is a layer provided by Windows Server 2008 and later that HSM manufacturers can interface with. PKCS #11 is an API provided by each HSM vendor that Verify Privilege Vault can interface with to perform cryptographic operations. If your HSM properly supports CNG or PKCS #11 and supports the right algorithms, Verify Privilege Vault can use it.
Below is a list of known HSMs that are compatible with Verify Privilege Vault:
Table: Compatible HSMs
| Vendor | Device | Notes |
|---|---|---|
| Amazon | Amazon CloudHSM (Cavium) | CNG and PKCS11 compatible with version 5.0.0 and greater. Per Amazon documentation: PKCS #11 library for AWS CloudHSM. For PKCS11 setup in Verify Privilege Vault, you must enter the user pin in this format: username:password. |
| Entrust | nShield HSM | CNG and PKCS11 are compatible with version 12.80.4. See Entrust Integrations if you have issues with PKCS11. |
| Google Cloud HSM | Not supported because it uses a single-key slot in the KMS for their HSM slots. Secret Server requires a hardware slot* | |
| Securosys | Primus-E20 | CNG and PKCS11 compatible with version 1.46 and greater. |
| Thales | Luna Network HSM | CNG with firmware 7.7.0 and greater. FIPS mode requires OAEP padding type. PKCS11 is compatible with firmware 7.4 and greater. |
| Thales | Luna Cloud HSM (DPoD) | CNG with firmware 7.7.0 and greater. FIPS mode requires OAEP padding type. PKCS11 is compatible with firmware 7.4 and greater. |
| Utimaco | CryptoServer | CNG and PKCS11 are compatible with version 4.10.0. Version 5.1.1.1 is not compatible—fails with CC mode. |
| Yubico | YubiHSM 2 FIPS v2.2 | CNG is compatible with version 4.10.0. PKCS11 is not compatible with version 5.1.1.1—does not support AES CBC mechanism. |
* Produces this error:

Silent HSM Operation
Because Verify Privilege Vault is a Web application with no one physically present at the server at most times, Verify Privilege Vault interacts with the HSM in "silent" mode. This prevents the HSM from attempting to interact with any users logged onto the server.
Some HSM features require interaction. If the HSM is configured in a way that requires interaction, Verify Privilege Vault cannot communicate with the HSM and fails during the configuration steps.
For example, Operator Card Sets (OCS) in Thales network HSMs are such a configuration. If the Thales CNG provider is configured to use an OCS for key protection instead of module protection, someone must be physically present at the HSM and the server to insert their operator card when the key is needed. If the OCS quorum is more than a single card, Verify Privilege Vault cannot interact with the HSM because it requires inserting and removing the OCS cards.
In that case, we recommend that Thales' CNG provider is configured to use module protection instead of an OCS. It is possible to use an OCS with Verify Privilege Vault if the quorum is exactly one card and the card is left in the HSM at all times.
Consult your HSM vendor and their documentation to ensure that the HSM and their CNG provider are able to operate in silent mode and are configured to do so.
Configuring HSM Integration
To configure the HSM integration, go to the Admin > Configuration menu and click HSM in the Configuration section.
For CNG:
You can find the list of available CNG Providers by querying for the list of registered CNG providers. Each provider must correctly report that it is a "Hardware" provider, and that it is not a Smart Card reader. If an error occurs while querying the CNG provider for its properties, it will not appear in the list; however the error is reported to Verify Privilege Vault's system log. If the desired CNG provider does not appear in the list of CNG providers, ensure that the provider is correctly registered and that IIS has been restarted after the CNG registration. Also check that an error is not occurring while querying the HSM by examining the system log.
For PKCS #11:
Each HSM vendor provides a cryptoki library (dll) for PKCS #11 that Verify Privilege Vault can interface with to perform cryptographic operations. Please note:
-
This DLL must be copied to
c:\inetpub\wwwroot\SecretServer\pkcs11folder for Verify Privilege Vault to see it. -
This DLL must support CKM_AES_KEY_GEN and CKM_AES_CBC_PAD mechanisms and the slot must be a hardware slot.
Along with the DLL, a token label and the user PIN are needed for Verify Privilege Vault setup. Please refer to your HSM vendor's documentation for obtaining these values.
Once the options are selected, Verify Privilege Vault simulates encryption and decryption operations and verifies the results to check that it is functioning properly. Finally, Verify Privilege Vault verifies the selected providers, and then enables HSM integration.
Stopping Other Nodes in a Clustered Environment
HSMs cannot be enabled, disabled, or rotated, in a clustered Verify Privilege Vault environment. Follow these steps to stop the other nodes while updating the HSM configuration:
-
Follow these steps on all nodes except for one:
-
Open IIS Manager on server node.
-
Expand the server.
-
Select Application Pools.
-
Right-click on the Verify Privilege Vault application pool.
-
Select Stop.
-
-
Follow these steps on the one running node:
-
Navigate to Administration > Configuration > Backup.
-
Click on Run Backup Now. This backs up the Verify Privilege Vault database and application files.
-
Navigate to Administration > Configuration > HSM.
-
Click on these HSM options: Enable HSM, Disable HSM, or Rotate HSM Key and follow the previous instructions.
-
Once completed, go back to IIS Manager and recycle the Verify Privilege Vault application pool, or open a command prompt window as an administration and perform an IIS reset.
-
Confirm that accessing secrets in Verify Privilege Vault is successful.
-
-
Follow these steps on each of the other server nodes:
-
Copy the updated
encryption.configfile from the one running node to thec:\inetpub\wwwroot\SecretServerfolder. -
Open IIS Manager.
-
Expand the server.
-
Select Application Pools.
-
Right-click on the Verify Privilege Vault application pool.
-
Select Start.
-
Confirm that logging in and accessing secrets in Verify Privilege Vault is successful.
-
Enabling HSM
To enable the HSM:
-
Navigate to Administration > Configuration > HSM.
-
Click the Enable HSM button.
-
Important: back up the
encryption.configfile before proceeding. -
Click the Next button.
-
Select the API type.
-
Select the required options:
-
For CNG, select the HSM Persistent Provider, Key Size, and Padding Type.
-
For PKCS11, select the Library Name and type the token label and user PIN.
-
-
Click the Next button. This performs a test to ensure the HSM can be used.
-
Click the Next button.
-
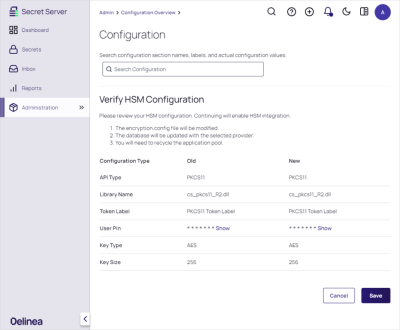
Verify the HSM configuration.
-
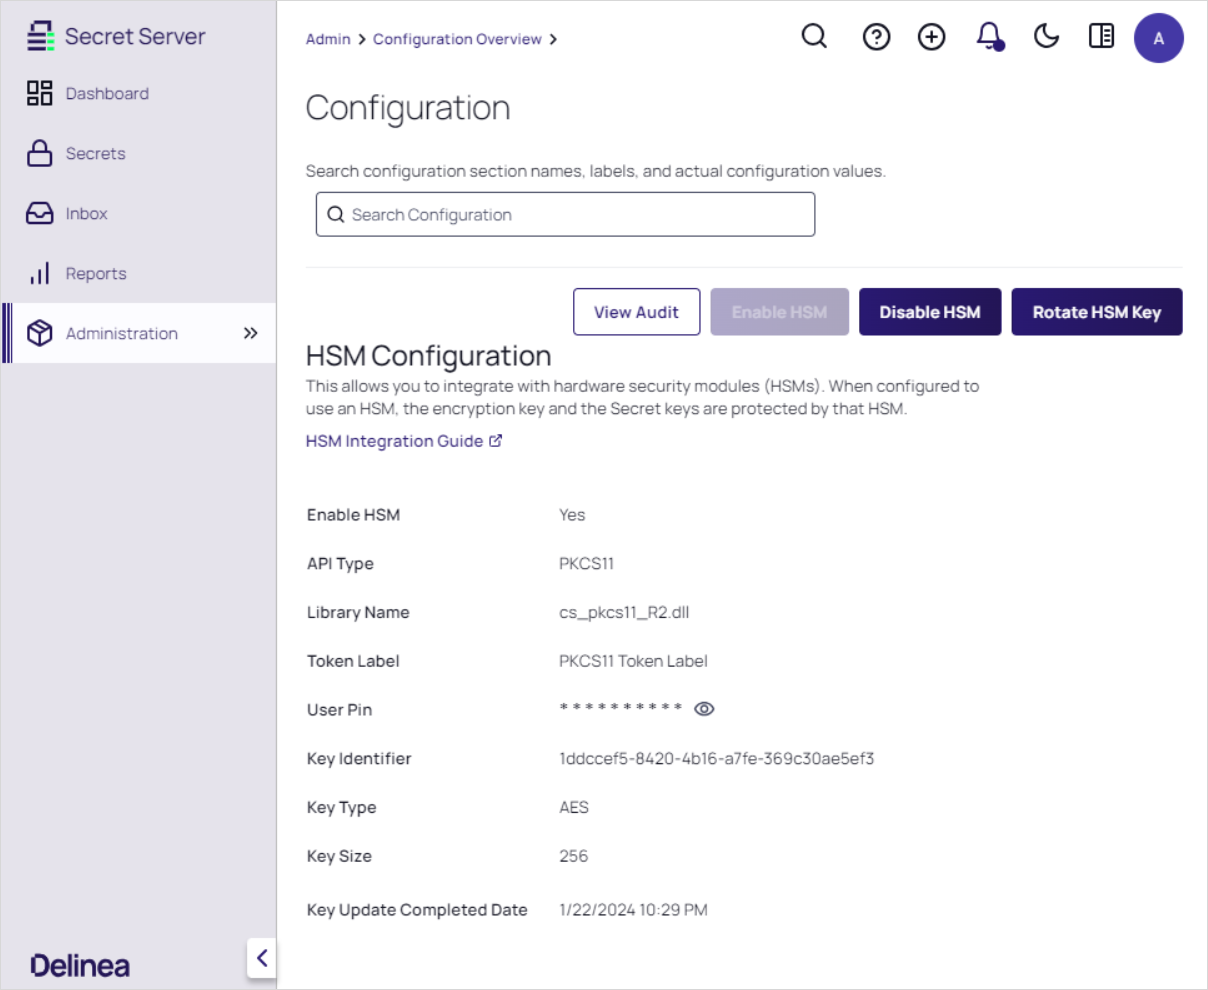
Click the Save button. The enabled configuration looks like this:
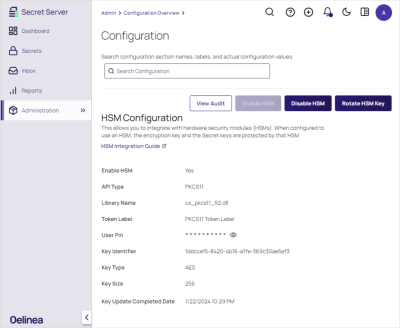
-
Do an IIS reset or application pool recycle. This starts the rotation.
Rotating the HSM Key
If HSM is enabled, Verify Privilege Vault can now rotate the HSM key to ensure the secret keys are always protected by an HSM key. Rotating the HSM key only decrypts the secret keys and then re-encrypts them with the new HSM key. We recommend performing a secret key rotation after the HSM key has been rotated.
To rotate the HSM key:
-
Navigate to Admin > Configuration > HSM.
-
Click the Rotate HSM Key button.
Back up theencryption.configfile before proceeding. -
Click the Next button.
-
Select the API type.
Verify Privilege Vault is unable to rotate to a different API type. So the selection will be the same API type as currently used.
-
For CNG, select the HSM Persistent Provider, Key Size, and Padding Type.
-
For PKCS11, select the Library Name and type the token label and user PIN.
-
Click the Next button. This performs a test to ensure the HSM can be used.
-
Click the Next button.
-
Verify the new HSM configuration:
-
Click the Save button.
-
Do an IIS reset or application pool recycle. This starts the rotation.

Disabling HSMs
To disable an HSM:
-
Navigate to Administration > Configuration > HSM.
-
Important: back up the
encryption.configfile before proceeding. -
Click the Disable HSM button. A warning popup appears:
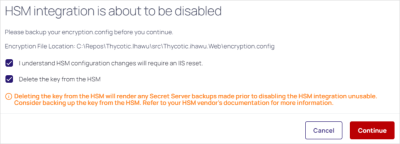
-
Decide if you want to delete the key from the HSM. Keep in mind deleting the key makes any backups using this key unusable.
-
Click Continue.
-
Do an IIS reset. This starts the rotation.

Securing HSM Integration
The wizard to enable, rotate, and disable HSM integration is protected by the "Administer HSM" role permission in Verify Privilege Vault. The permission should be carefully assigned—if at all. Additionally, you can create an event subscription that sends alerts when the role permission is assigned or unassigned from a role.
Configuring the HSM also has its own event subscriptions for when the HSM integration is enabled, rotated, or disabled.
Additionally, an you can add an application setting to Verify Privilege Vault to prevent changes to HSM configuration. Enabling, rotating, and disabling this requires direct access to the file system where Verify Privilege Vault is installed.
To enable this, edit the web-appSettings.config file within Verify Privilege Vault to contain a key called LockHsmConfiguration with a value of True as follows:
<?xml version="1.0" encoding="utf-8" ?>
<appSettings>
  <add key="LockHsmConfiguration" value="True" />
</appSettings>
This prevents access to the HSM configuration pages, regardless of role permissions. The only way to gain access is to remove this setting, thus proving you, at a minimum, have access to the server where Verify Privilege Vault is installed.
HSM Redundancy
HSM redundancy varies from HSM to HSM. Please refer to the vendor's documentation on how to back up the HSM. Backups are typically either made to common file location, another HSM, or onto a smart card with the HSM's built-in smart card reader.
As long as the HSM provider is installed on the server and a key exists on the HSM with the same identifier, Verify Privilege Vault attempts to use that key.
Testing HSM CNG Configuration
Verify Privilege Vault does its own testing and verification of the HSM and its CNG provider before the HSM integration can be enabled. To further diagnose any issues with the HSM, the certutil command line utility, which is part of Windows, can test the HSM with the –csptest option specified. An example output may contain something like this:
Provider Name: SafeNet Key Storage Provider

   Name: SafeNet Key Storage Provider

……

Asymmetric Encryption Algorithms:

  RSA

      BCRYPT_ASYMMETRIC_ENCRYPTION_INTERFACE -- 3

      NCRYPT_ASYMMETRIC_ENCRYPTION_OPERATION -- 4

      NCRYPT_SIGNATURE_OPERATION -- 10 (16)

    NCryptCreatePersistedKey(SafeNet Key Storage Provider, RSA)

        Name: cngtest-6166f8fe-8caf-4e30-8e5c-a-24575
……

Pass
Examine the output of the test by looking for your CNG provider's name for your HSM and verifying the result. We recommend running this test using the same account as the application pool Verify Privilege Vault is using. If the testing tool reports errors, consult your HSM's vendor or documentation for resolution.
PKCS #11 Log
The PKCS #11 logs are at c:\inetpub\wwwroot\SecretServer\pkcs11\log\SSPKCS11.log.
This captures the PKCS #11 activity between Verify Privilege Vault and the HSM when enabling, rotating, and disabling.
Also, each HSM vendor will have a way to output the PKCS #11 logging to a file. Please refer to your HSM vendor’s documentation on how to set up the logging.
Troubleshooting
If this error message “Thycotic.HSM.CNG.CngException: Failed to operate transformation” occurs, do the following:
-
Go to the Verify Privilege Vault directory.
-
Open the
web-appSettings.configfile located atc:\inetpub\wwwroot\SecretServer. -
Add the following tag in that file:
Copy<?xml version="1.0" encoding="utf-8" ?>
<appSettings>
<add key="RecycleAppPoolOnHSMError" value="true" />
</appSettings> -
Restart IIS.