Unix/Linux Specific Policies
Verify Privilege Manager for Linux/Unix and Windows for servers is End of Sale/Renewal only.
Once your Unix/Linux agent is registered, creating policies for your Unix/Linux machines follows a very similar process to creating policies for Windows machines in Verify Privilege Manager. The main approach should be via the use of the Policy Wizard aided by the following:
-
Collect File Data: This enables Verify Privilege Manager to recognize specific files and file types in your environment. The file data that you want to target with policies are called Events. All imported files can be viewed via File Inventory.
-
Create Filters: This step sorts important file data (Events) according to different criteria.
-
Create Policies: This step defines what
- Actions to perform on applications and
- Targets (Locations) for those actions.
Refer to the Creating Policies topic.
-
Assign Filters to Policies: This step directs a Policy's actions to the appropriate Events happening on your network. This step also allows a Policy to be set to active.
-
Order your Policies based on priority level—Once your policies are created, the order they execute across your network matters. See the Policy Priority topic for more details.
In Unix/Linux, roles are bifurcated into two groups: Admins, and Users rather than by Group Policy Objects (GPO) found in Windows environments.
Example Policies
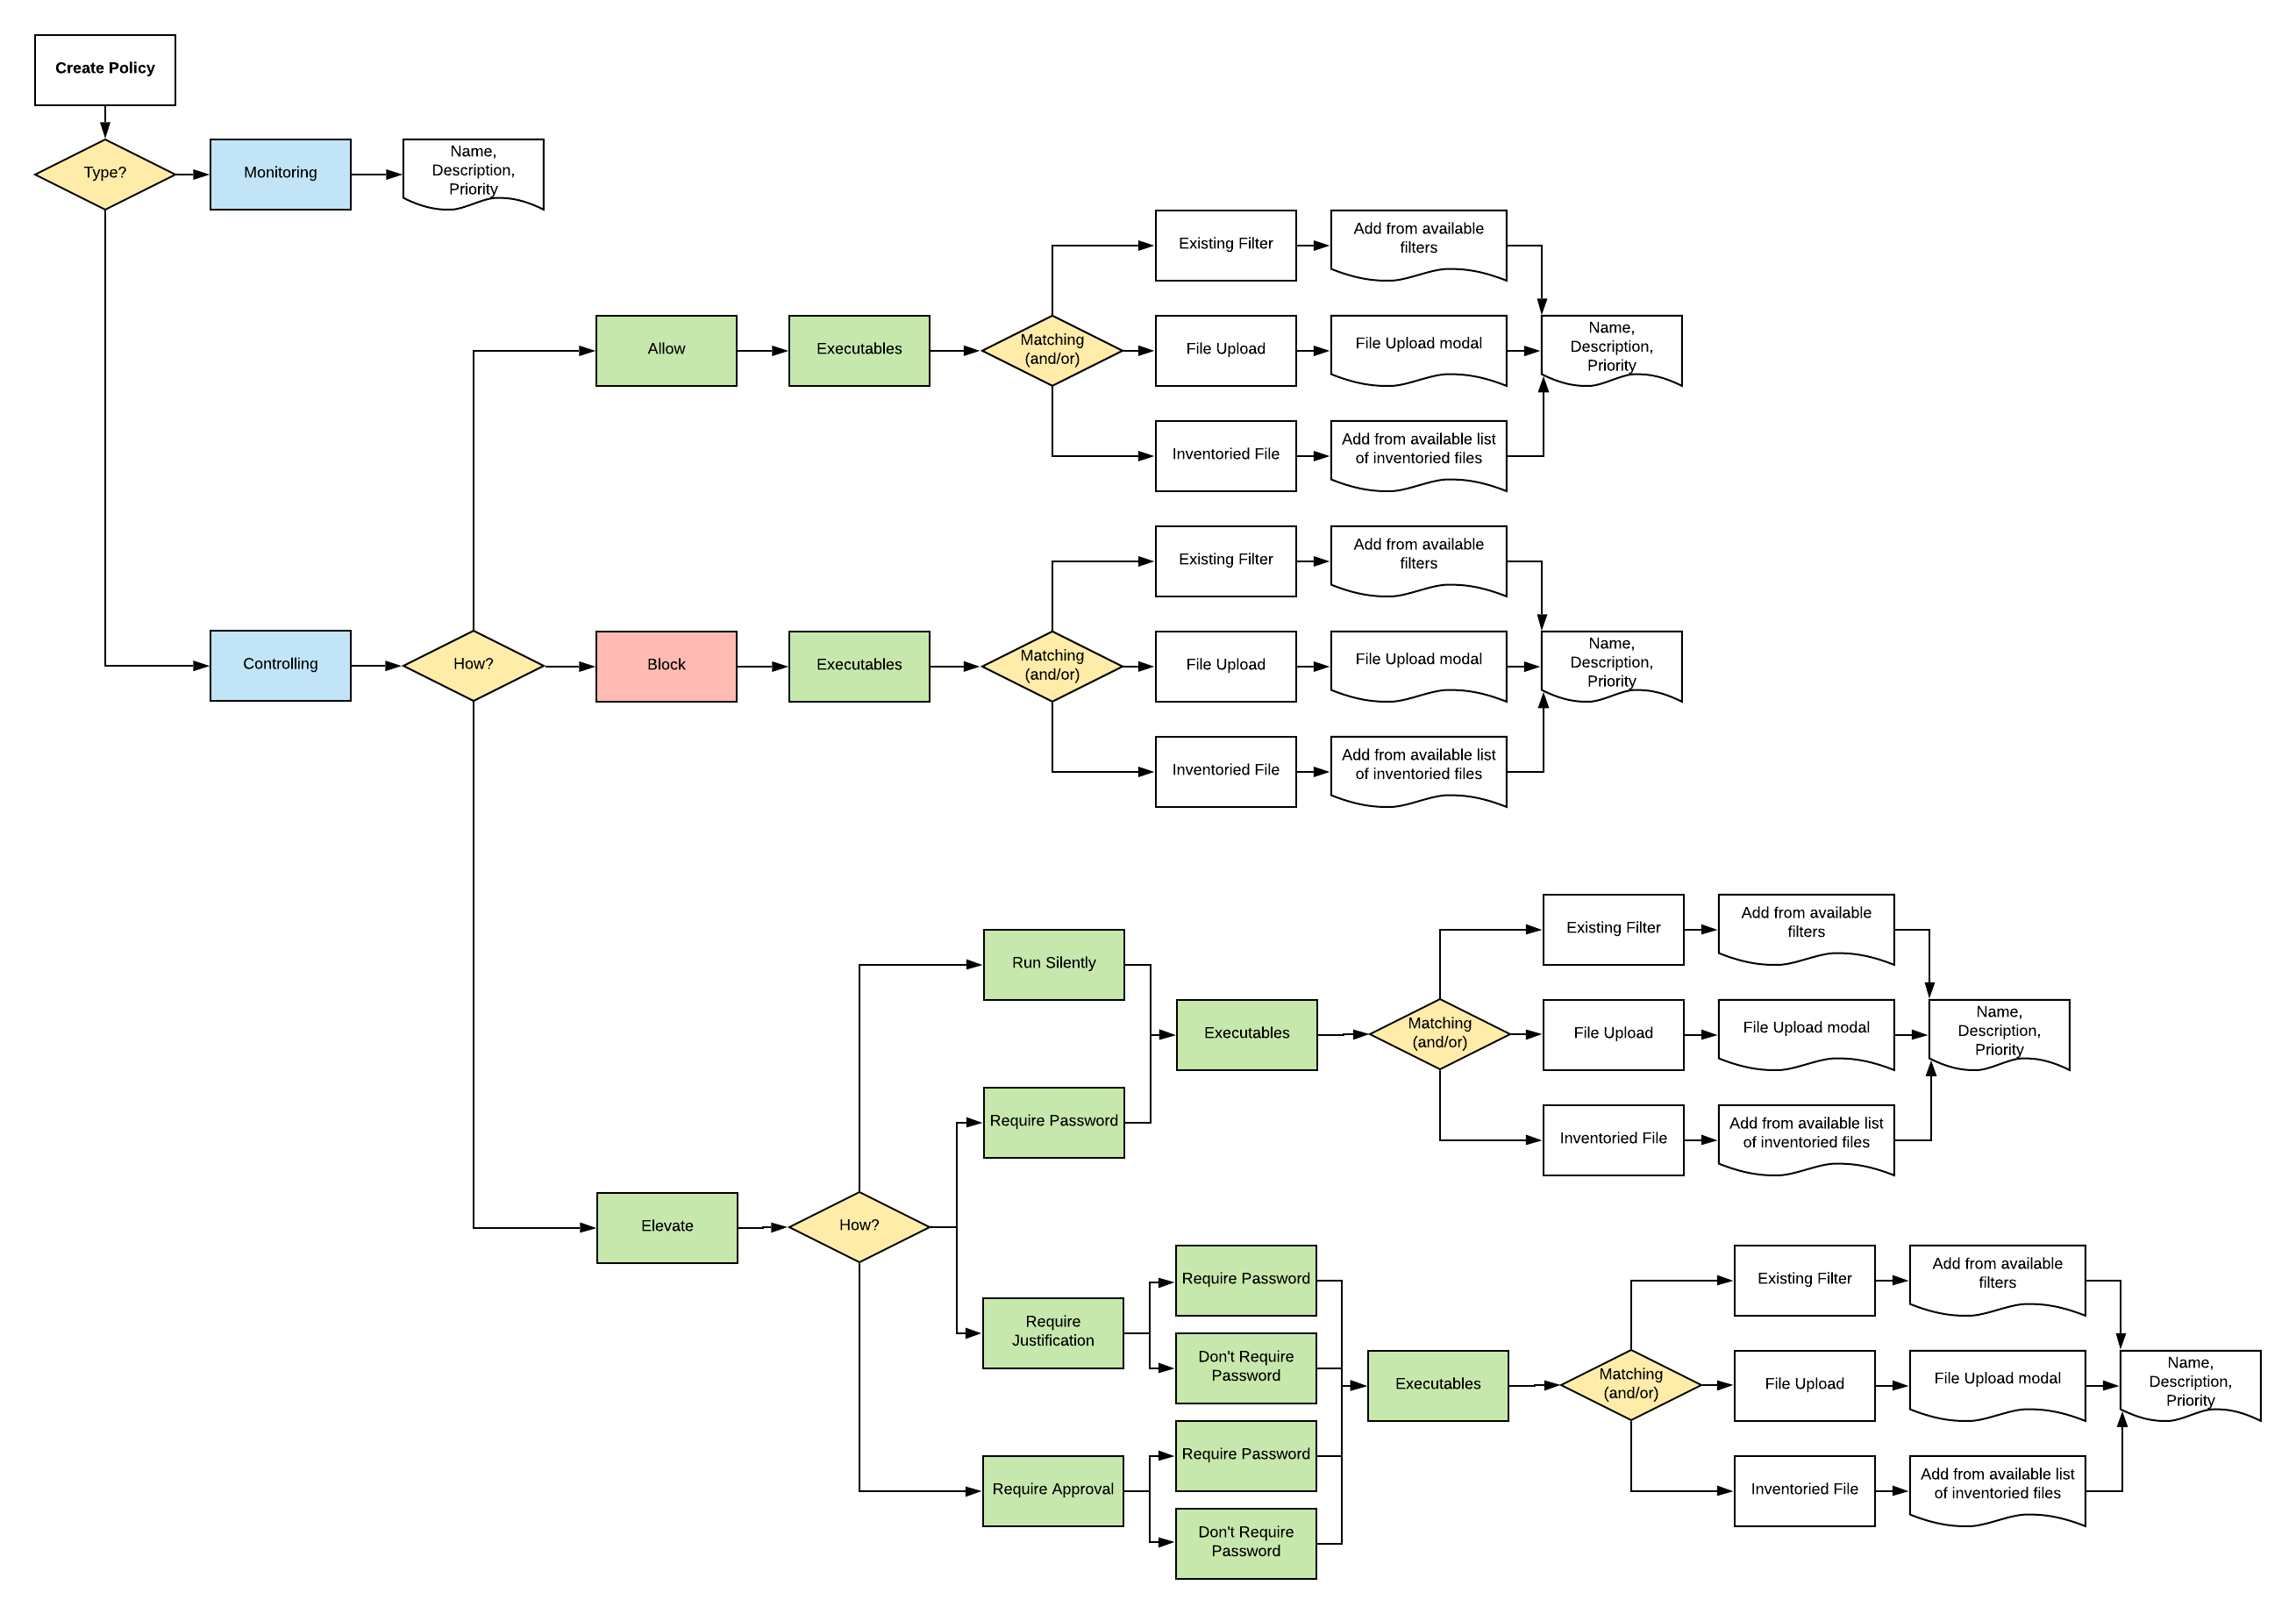
Wizard Flow Diagram
The following diagram shows the typical decision flow when using the policy wizard for creating Unix/Linux policies.
