Setting up a SAML Integration
SAML integrations facilitate the authentication and authorization between providers. If required, multiple SAML providers can be created and utilized in a SAML integration.
Currently, IBM Security does not support Identity Provider (IDP) initiated connections. Only Service Provider (SP) initiated connections are supported.
Refer to the following instructions for specific SAML integrations with Verify Privilege Manager:
All SAML Foreign Systems integrations follow these same principle steps.
- Set up the identity provider. Refer to Managing Authentication Providers.
- Enable authentication for the SAML identity provider on the Authentication tab.
Ensure that authentication for the SAML identity provider is enabled or the configuration will fail. Refer to Authentication Tab.
- Use data from the identity provider setup for setting up the Verify Privilege Manager Foreign Systems.
Create a new Application
An application is a definition for integration with an external application (in this case, Verify Privilege Manager).
Create a new application. Don’t select one of the existing:
-
In the top right of the app page, click Create New App.
-
From the Platform drop-down, select Web.
-
From the Sign on method options, select SAML 2.0.

-
In the App name field provide an Application Name. Depending on your use case, provide an application logo and select App visibility settings.
-
Click Next.
Enter Application SAML Settings
On the next pages, you’ll configure the SAML settings.
-
Enter the Single sign on URL. The Single sign on URL is the root Verify Privilege Manager URL plus saml2/acs. For most systems this is
https://servername/Tms/saml2/acs. -
Enter the Audience URI, which can be anything as long as it matches what you put in Verify Privilege Manager. The default value in Verify Privilege Manager is
PrivilegeManagerServiceProvider. -
The Default RelayState can be left blank.
-
The Name ID format drop-down set to Unspecified.
-
From the Application username drop-down, select the username that corresponds to your provider.
The rest of the settings can be ignored.
-
Proceed via Next.
-
On the last page for the Are you a customer or partner? prompt, select the customer that corresponds to your provider.
-
Click Finish.
View Setup Instructions
After the app is created, you’ll want to click View Setup Instructions and leave the instructions open in the browser. You’ll want to copy and paste some of this info into Verify Privilege Manager in the next section.
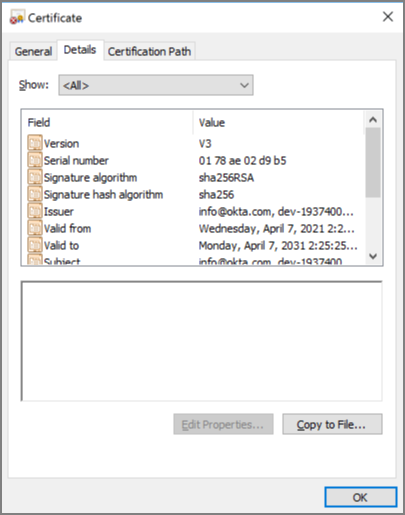
Save Certificate
Start with the certificate data.
- Click Download certificate and save the certificate as .cer.
- Once it’s saved, you should be able to open and view the certificate in Windows:
Verify Privilege ManagerForeign Systems Setup
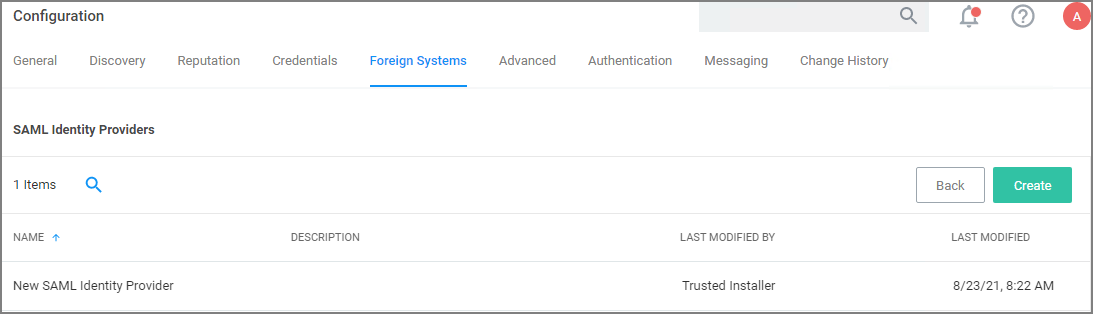
Create SAML Identity Provider
-
Navigate to Admin | Configuration and select Foreign Systems.
-
Click SAML Identity Providers.
-
Click Create.
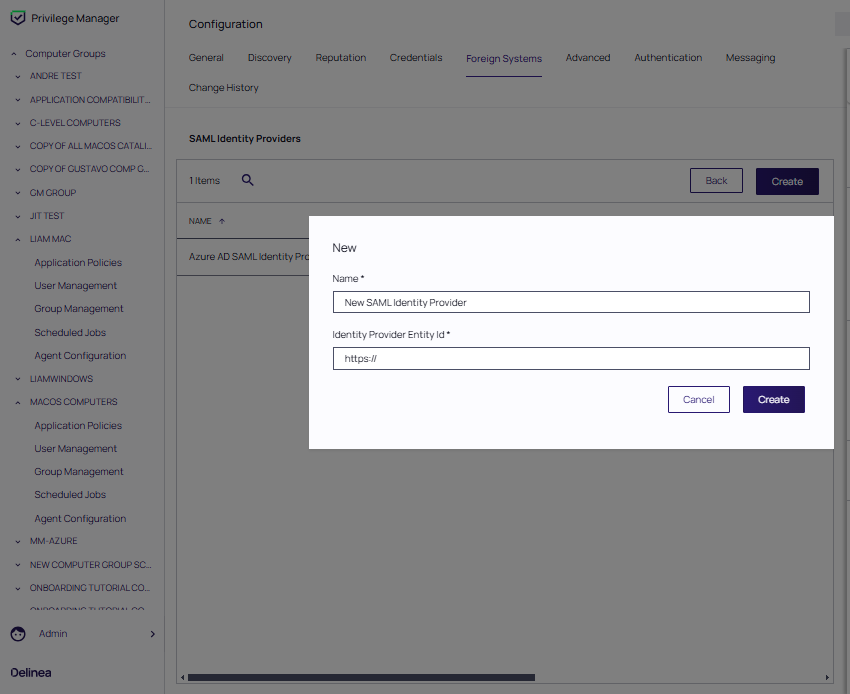
-
Enter a name for the Foreign System.
-
For Identity Provider Entity Id, enter the issuer name from the setup instructions.
-
Click Create.
-
Under Identity Provider | Single Sign On URL enter the URL from the setup instructions.
-
Under Certificate, select the certificate you saved earlier.
-
From the Binding drop-down, select HTTP Post.
-
Under Privilege Manager Entity ID match what you entered in the app setup for Audience URI (SP Entity ID), for example PrivilegeManagerServiceProvider, if you went with the default suggestion.
-
Under Privilege Manager URL, enter your instance URL, for example
https://myprivilegemanger/Tms/. -
Click Save Changes.
After saving the identity provider, Verify Privilege Managershows the certificate thumbprint in the UI. It should match what Windows shows for the thumbprint on the certificate you downloaded.
Configure User Options
Normally you need to create a new Federated user that matches a username from your provider.
But you can optionally have Verify Privilege Manager match AD users by DOMAIN\username and/or create new Federated users automatically.
Match Active Directory Users
If you select this option, you must configure your provider to send users in the format DOMAIN\username or username@domaindnsname. You should import users (and groups if desired) from AD, and add the desired user(s) to one or more Verify Privilege Manager roles before attempting to sign in.
Create Users Automatically
When this option is selected, Verify Privilege Managerwill create a new Federated user whenever a username cannot be matched to an existing Federated user (or AD User if the option above is selected).
You’ll still need to add the user to a Verify Privilege Managerrole before they’ll have any meaningful access. Support for group/role assertions is planned for a future release.
Managing Users
Create New Users
If you don’t have any users, you’ll need to go to the Directory section and add them.
These are the usernames your users are going to use when they log into Verify Privilege Manager. You can configure your provider to send Verify Privilege Manager a different username (like domain\username, or a short name like yoda).
Add Users to Application
Before you can login, users must be assigned in your provider's application.
- Go to Applications | Applications.
- Select your application.
- Select Assignments.
- Click assign and select one or more users.
After assigning a user, you can change the username to be whatever you want. Click the edit (pencil), and enter the username for your user (this only changes the username for this specific application).
Setup Active Directory Users
You can use Active Directory users that you’ve already imported into Verify Privilege Manager.
After you’ve imported from Active Directory, you still need to add the AD users (or AD groups) to Verify Privilege Manager roles.
Match by DOMAIN\username
Ensure the username in your provider matches the Global Identity data for the user in Verify Privilege Manager.
Match by username@dnsdomainname
Ensure the username in your provider matches the Global Identity UserId in Verify Privilege Manager, and the domain name part of the username matches the DNS domain name of the domain in Verify Privilege Manager. We don’t import this directly from AD, so we have to get it from the Global Identity and AD foreign system data.